

How To Take Portrait Photos With Iphone
Do you want to know how to use Portrait mode on iPhone? Portrait mode is the perfect tool for creating incredible iPhone portraits. In this tutorial, you'll discover how to use Portrait mode to take stunning portrait photos with professional background blur!
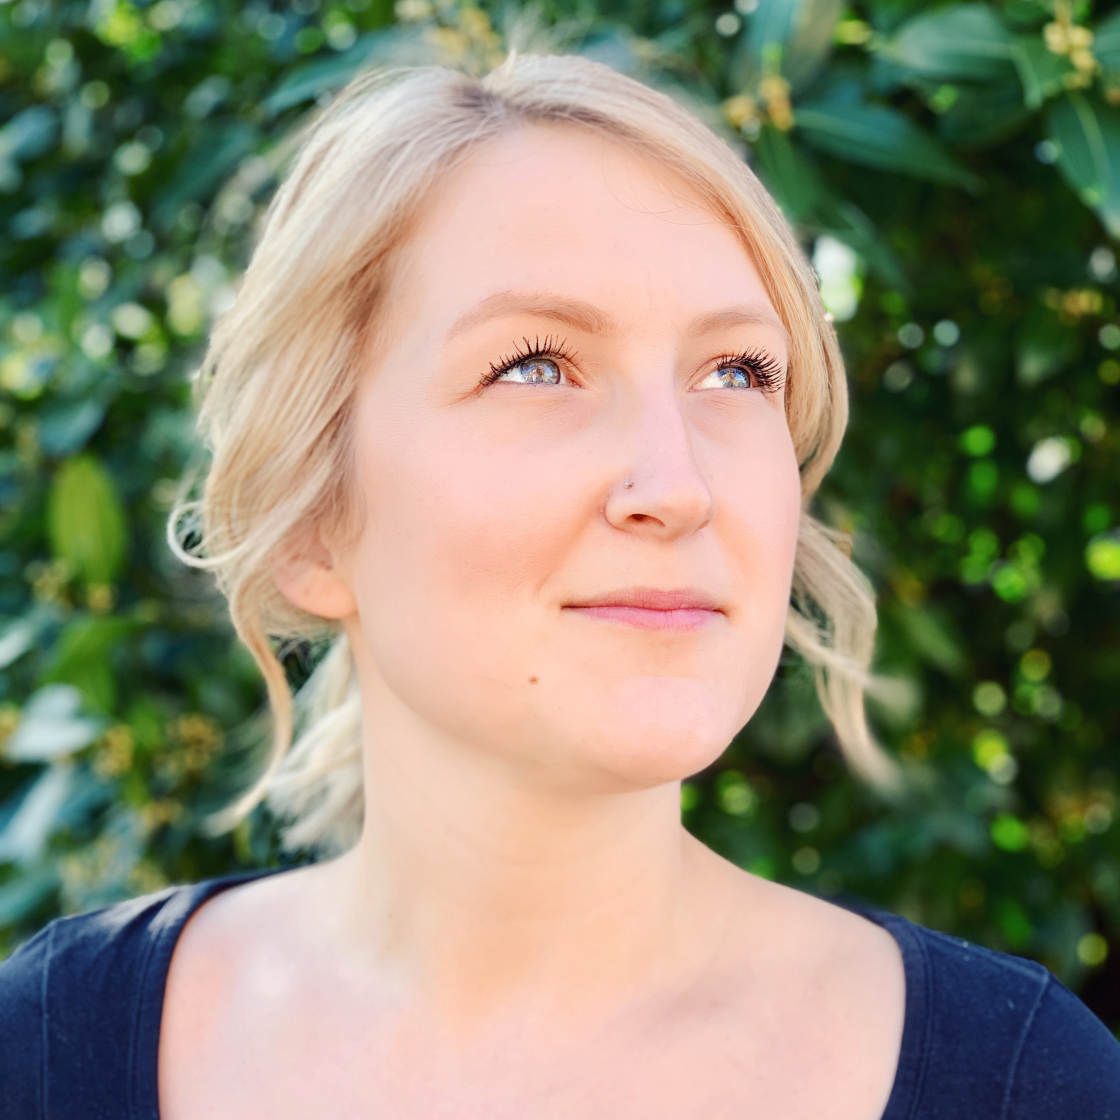
Table Of Contents: iPhone Portrait Mode
Click any title link below to go straight to that section of the article:
1. What Is Portrait Mode?
2. How To Use iPhone Portrait Mode
3. Use Depth Control To Change The Amount Of Blur
4. Use Portrait Lighting To Enhance The Light In Your Photos
5. How To Remove The Background Blur From Portrait Photos
6. Choose The Best Background For Incredible Blur
1. What Is Portrait Mode?
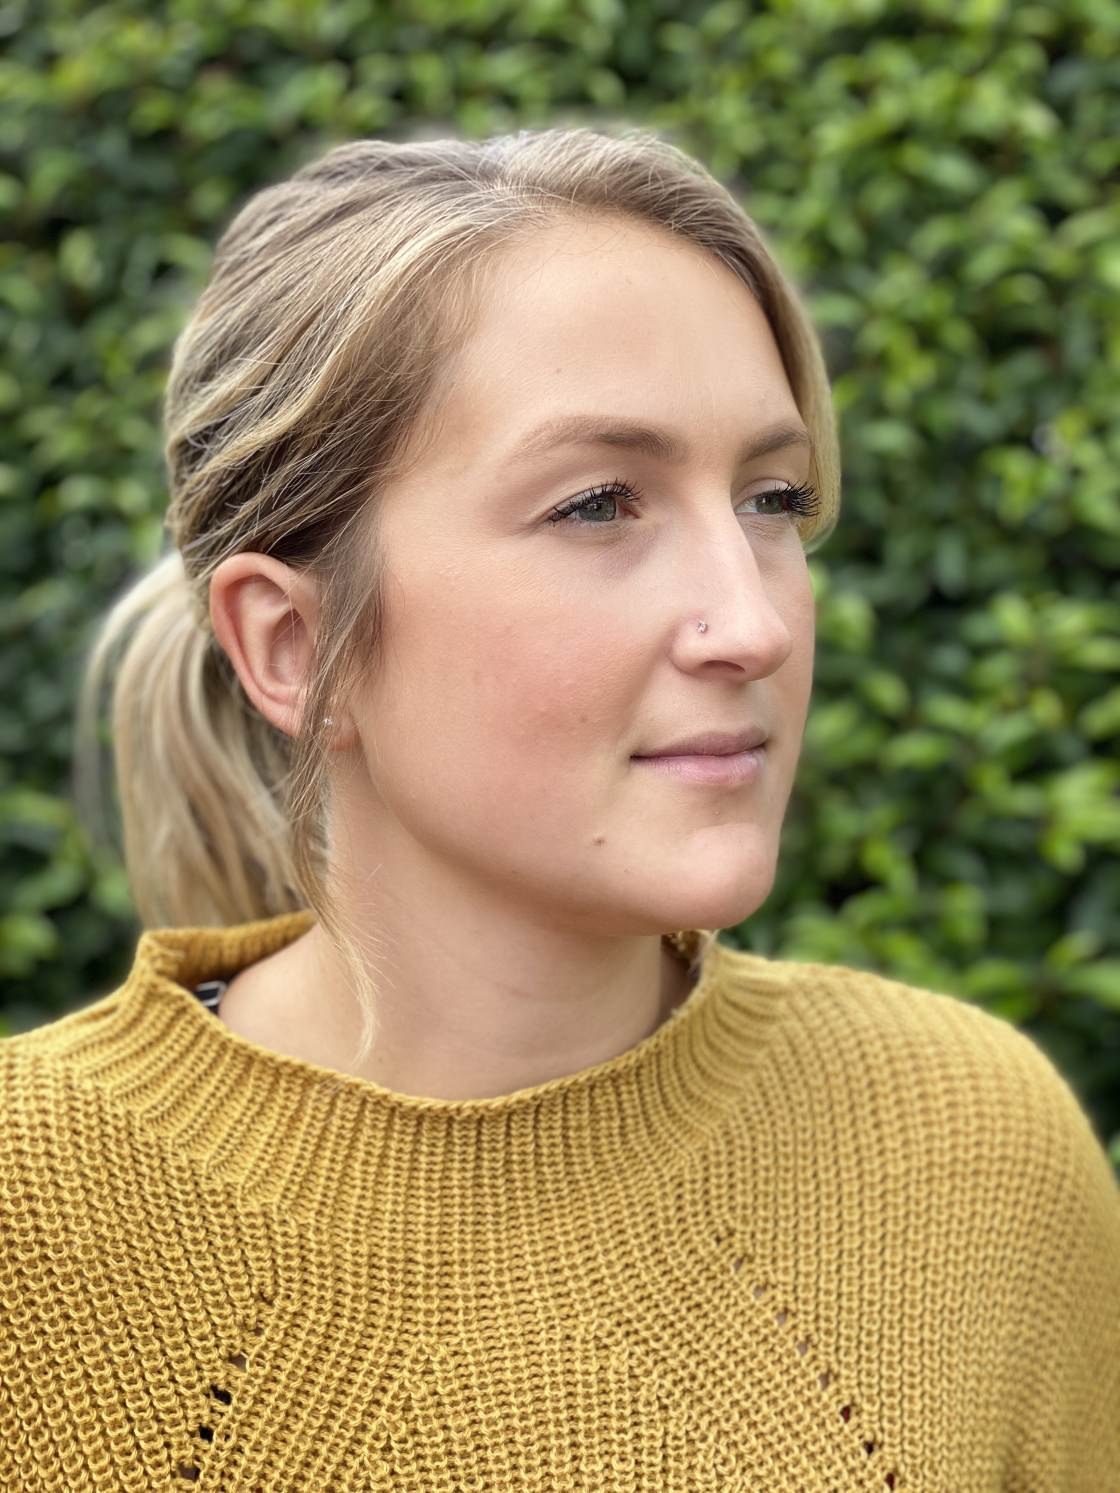
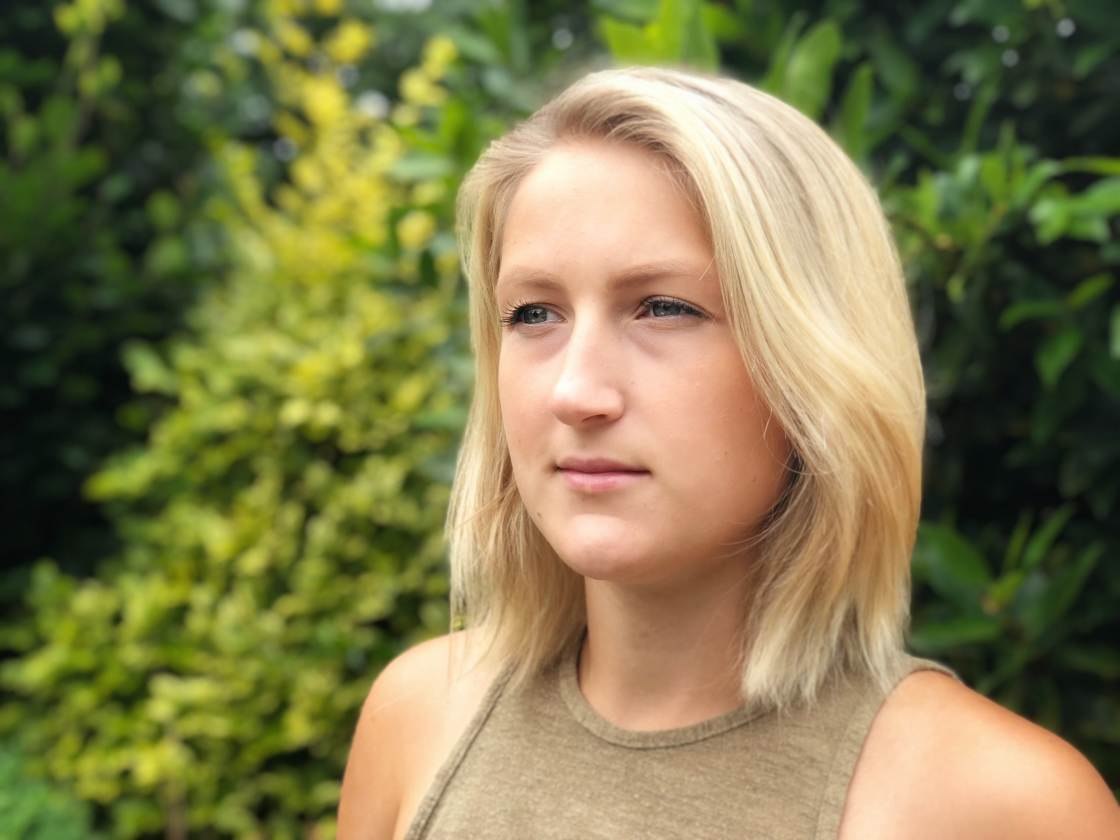
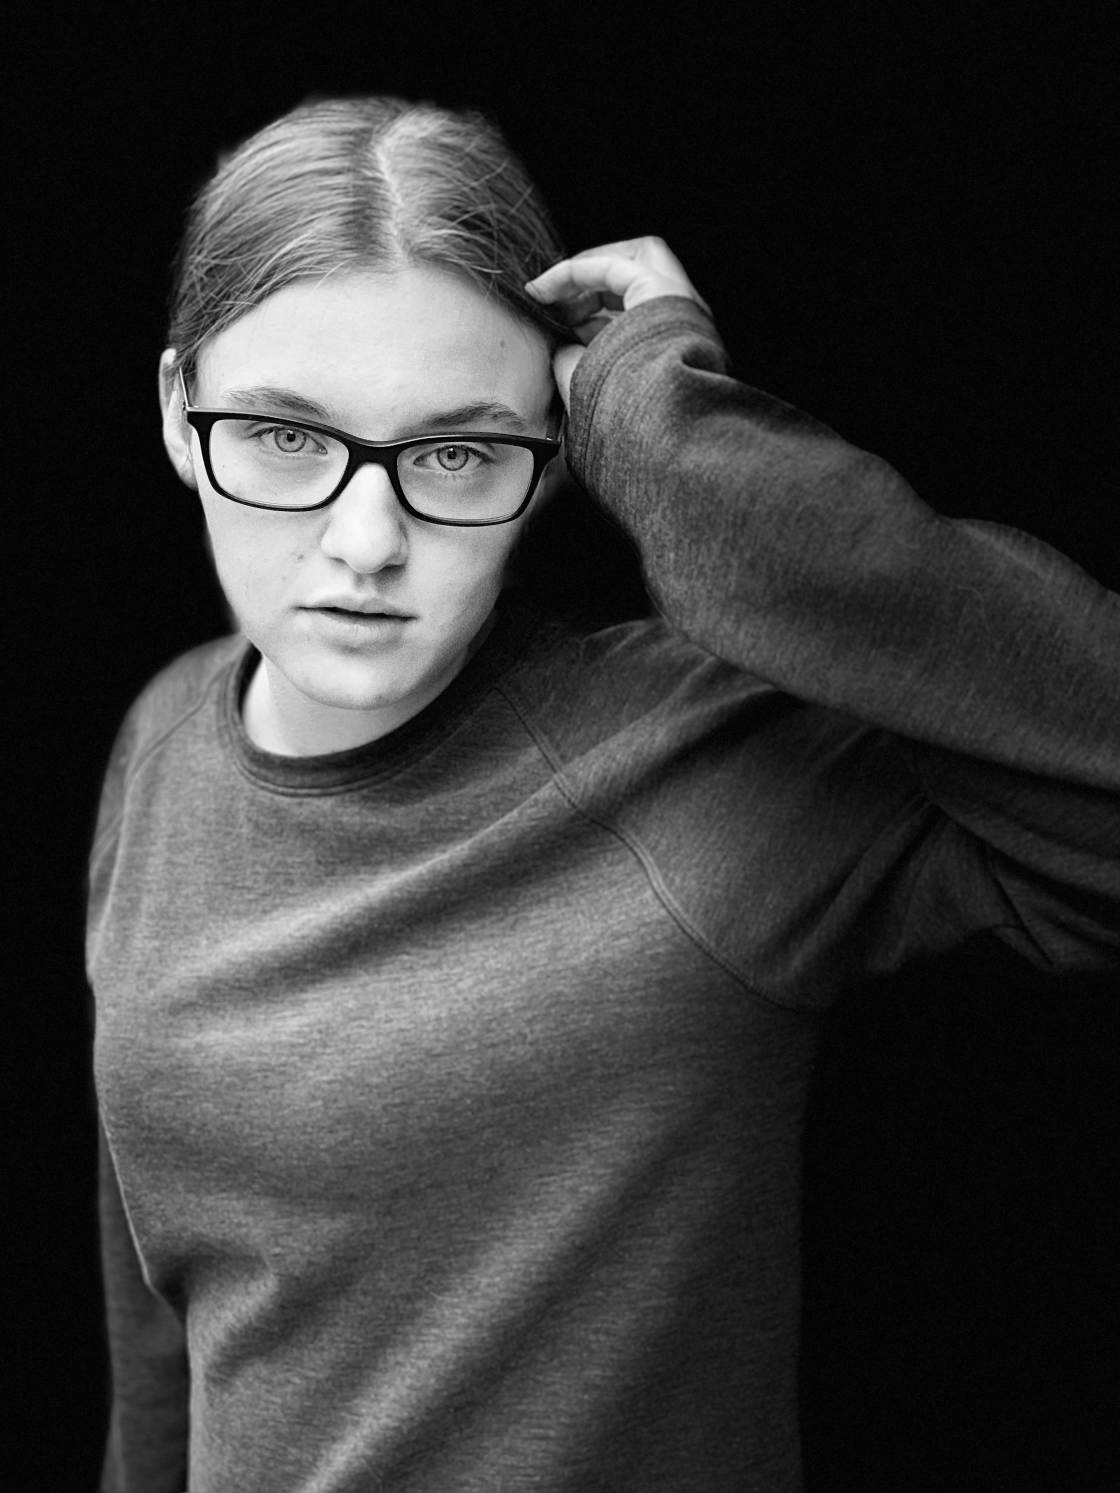
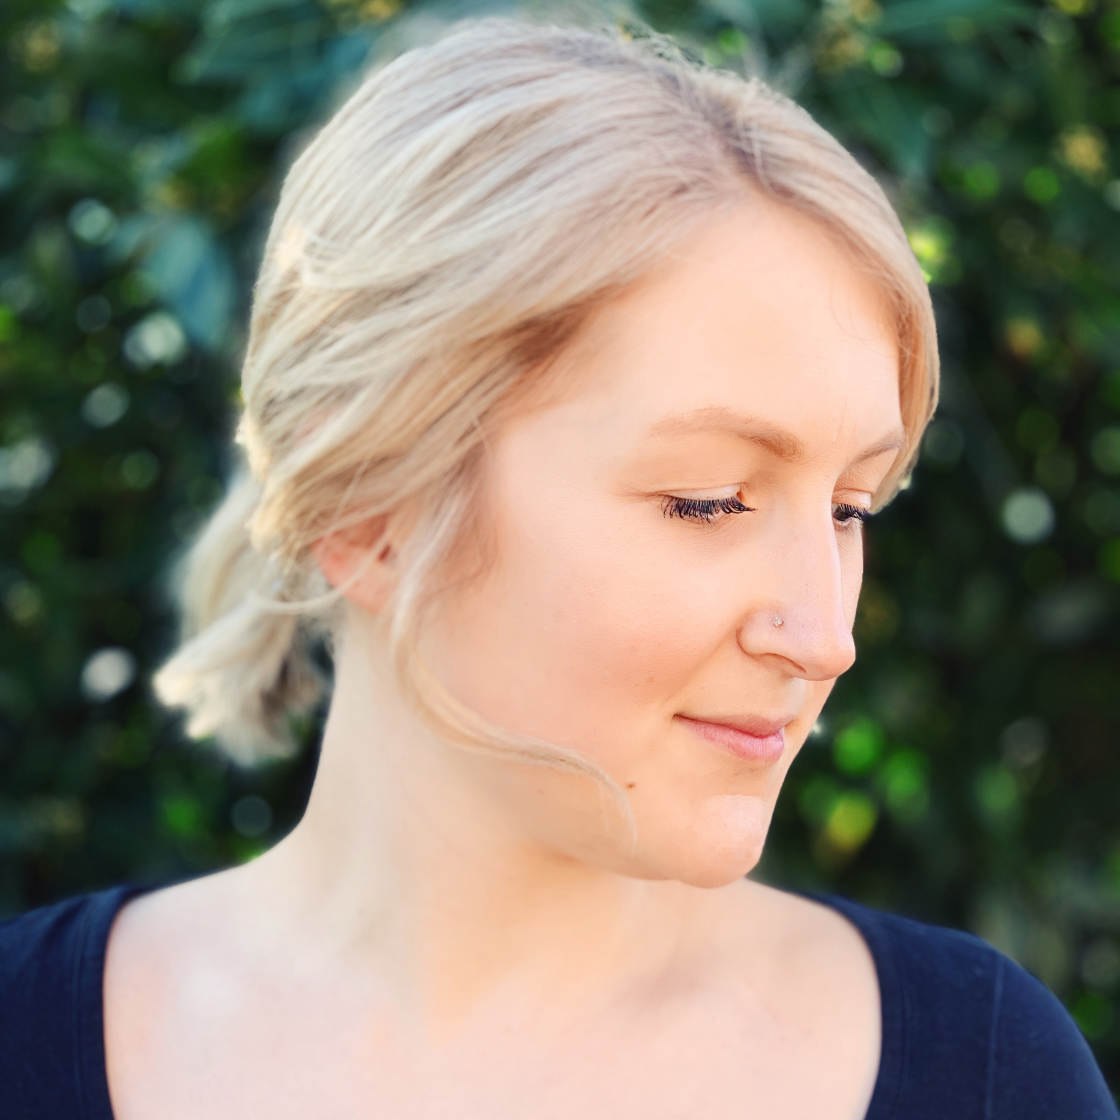
Portrait mode is a shooting mode in the iPhone's built-in Camera app. It uses clever software to blur the background in your photos.
Portrait mode allows you to take jaw-dropping, professional-looking portrait photos.
The subject's face will be perfectly sharp, while the background appears beautifully blurred.
A blurred background is great for emphasizing your portrait subject. It really makes your subject stand out.
It's especially useful when there's a busy, messy, or distracting background. The blur brings the viewer's attention back to the main subject.

Note that Portrait mode isn't available on all iPhones. So, which iPhones have Portrait mode?
You'll find Portrait mode on iPhone 11, 11 Pro, 11 Pro Max, XR, XS, XS Max, X, 8 Plus, and 7 Plus.
2. How To Use iPhone Portrait Mode
How do you use iPhone Portrait mode?
It's simple!
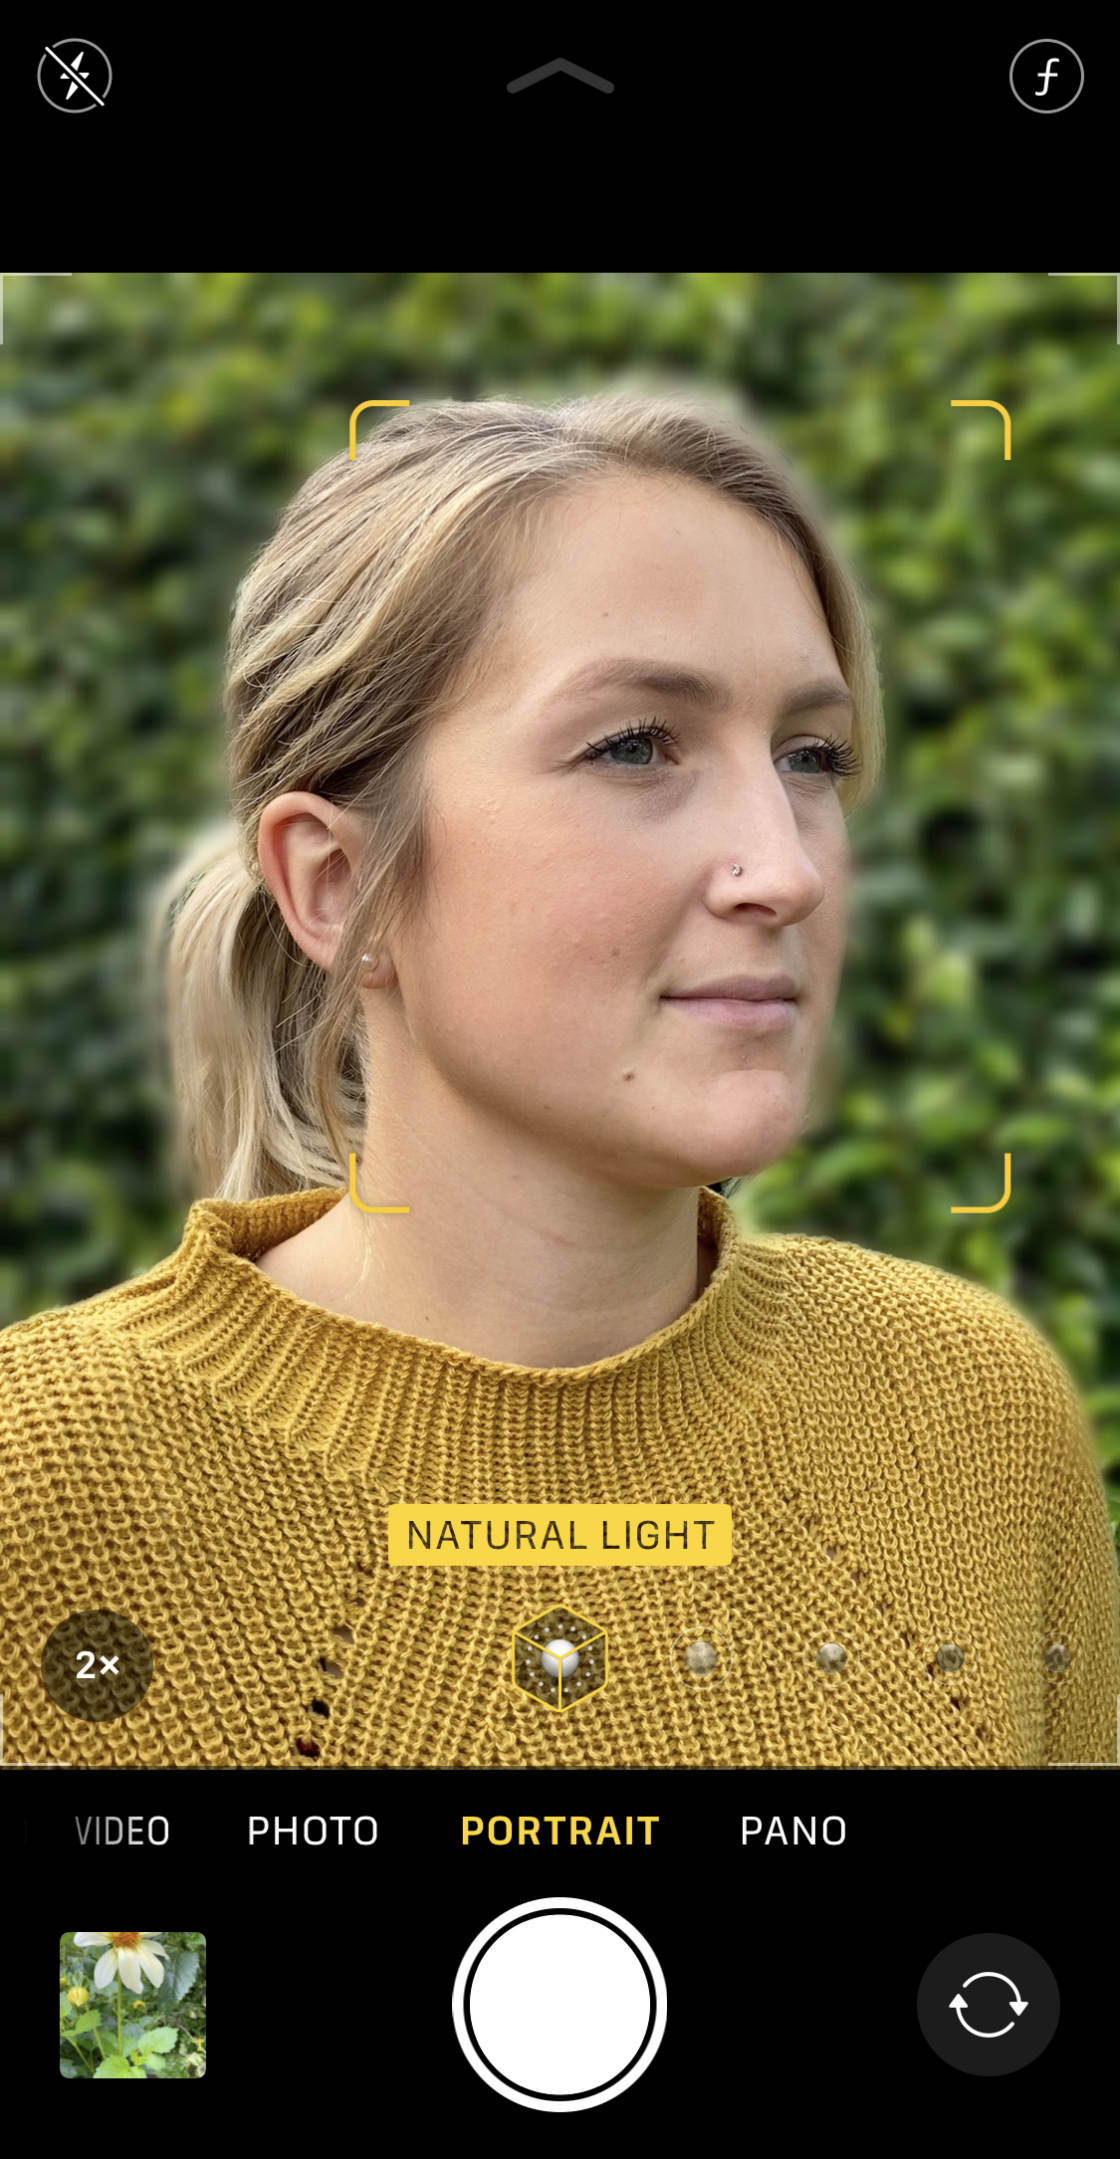
Open the Camera app. Then swipe across the shooting modes at the bottom of the screen and select Portrait.
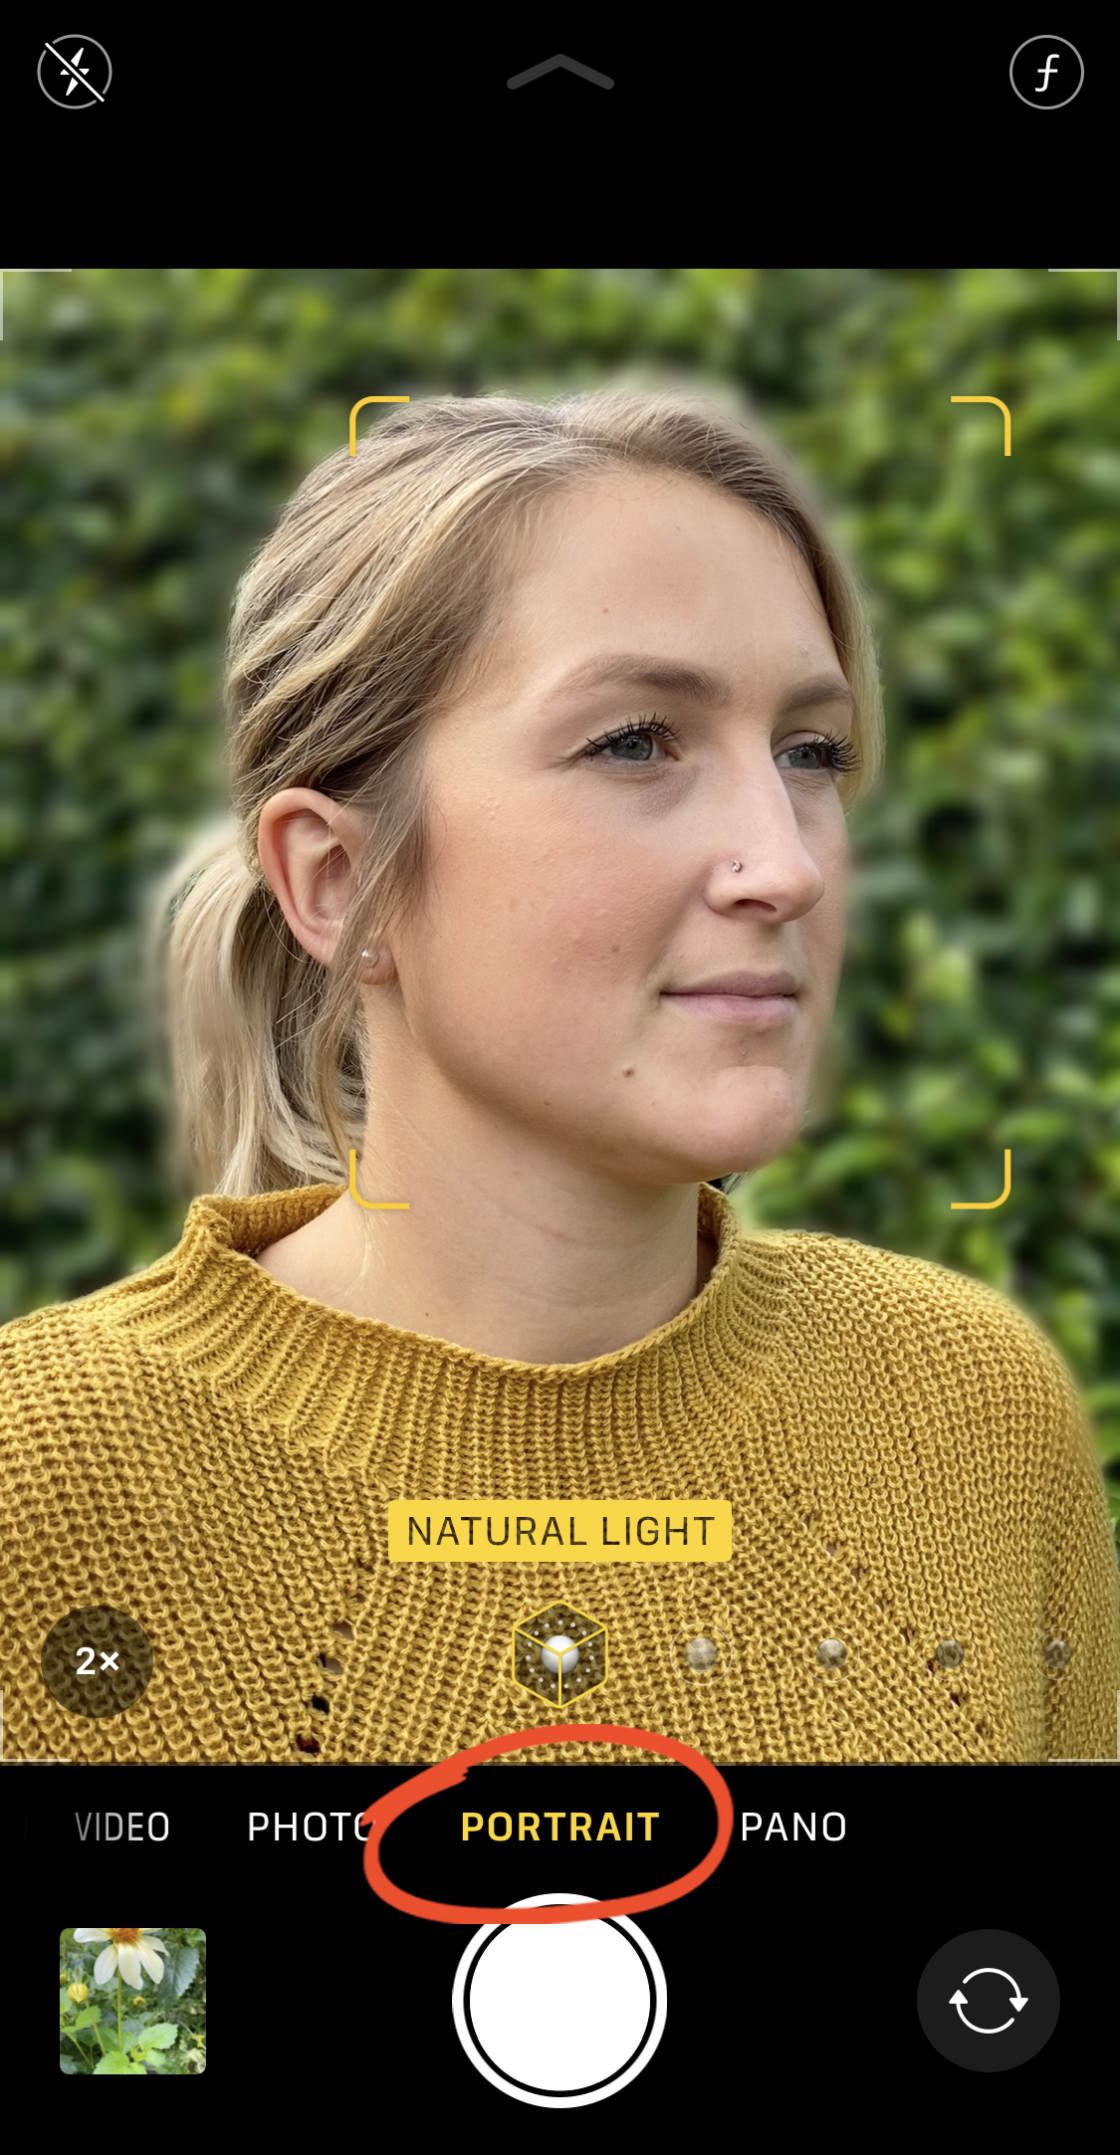
When using Portrait mode, there are a couple of things you need to consider:
First of all, Portrait mode doesn't work well in low light. If there's not enough light, a message will appear telling you more light is required.
Second, your subject has to be between two and eight feet from the camera. If your subject is too close or too far away, you'll be prompted to move closer or further away.
When you're at the correct distance from your subject, you'll see the words Natural Light in yellow. (On iPhone 7 Plus, you'll see Depth Effect instead.)

This means your iPhone has successfully identified the subject and the background.
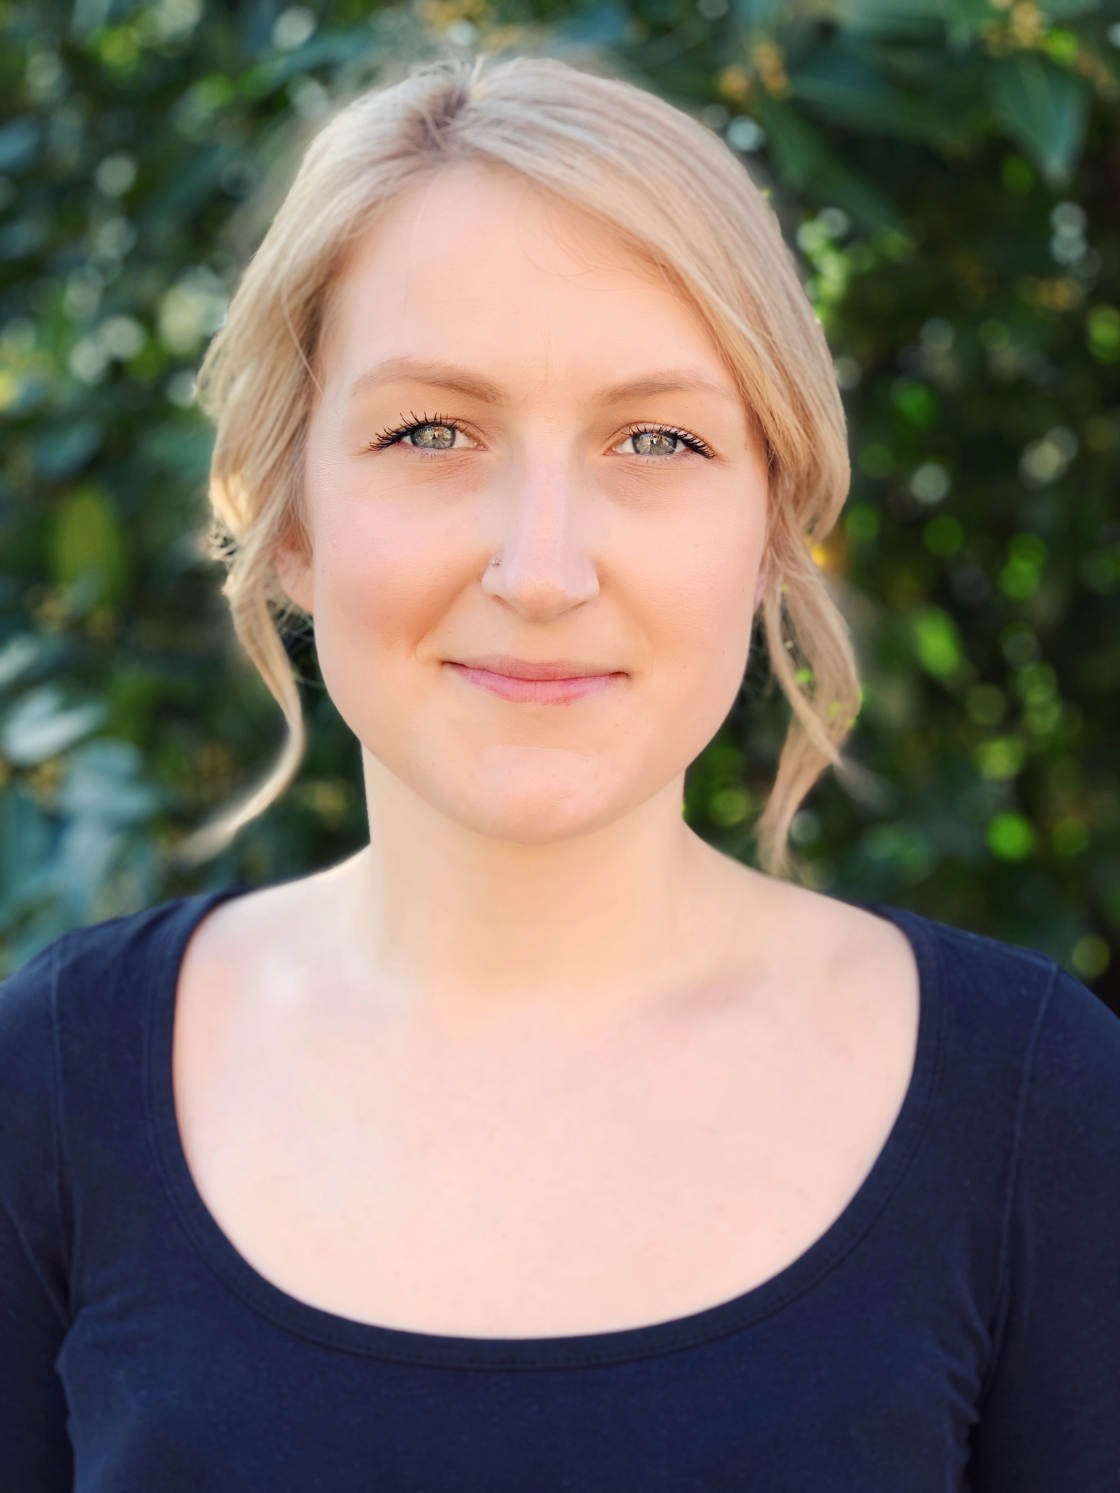
The camera automatically focuses on the face of your subject and blurs out the background.
Once you've composed your shot, simply press the shutter button.
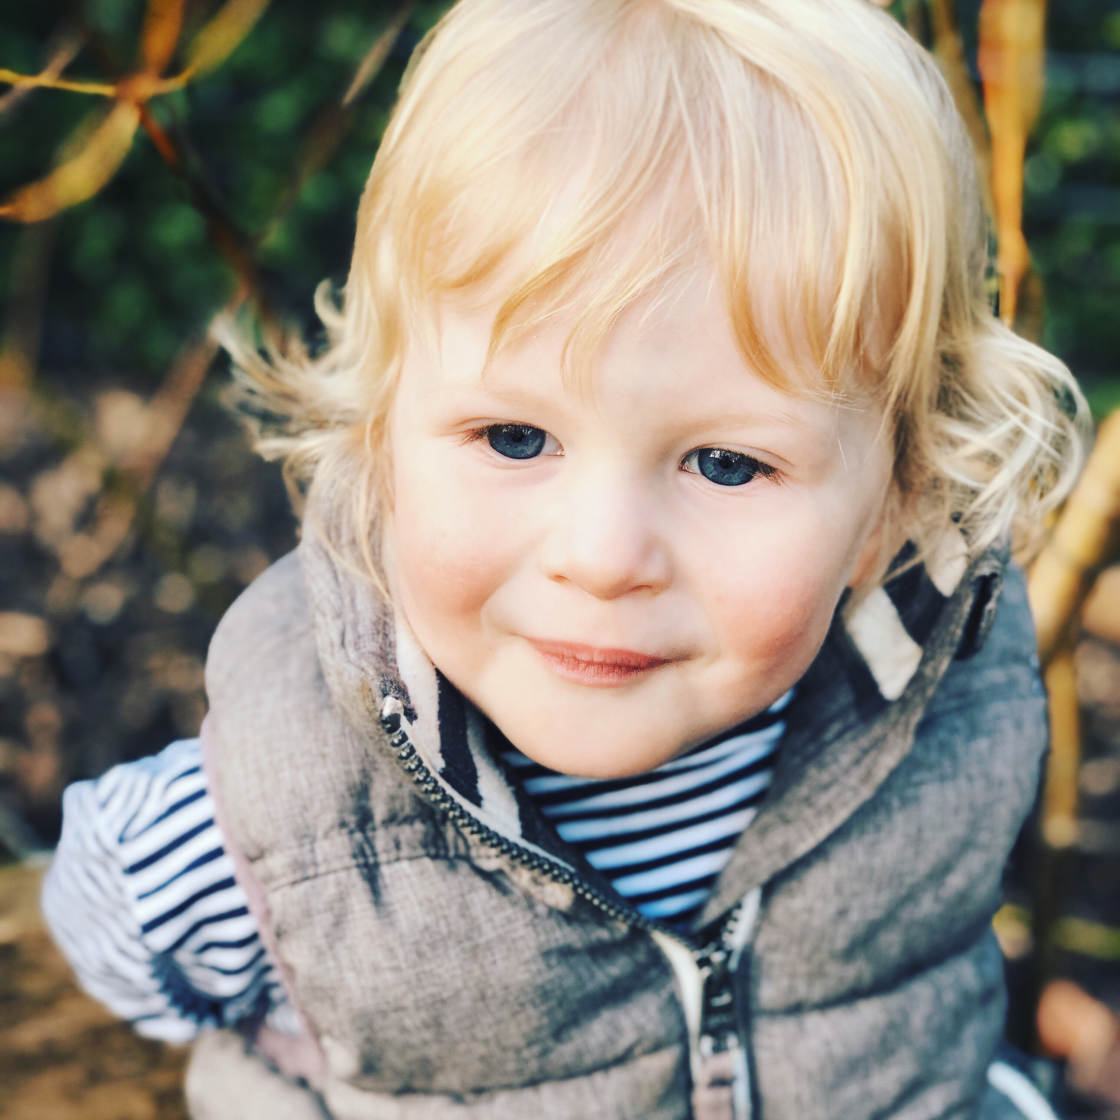
The result will be a beautiful portrait photo with a dreamy blurred background.
But there's a lot more to Portrait mode than this!
Once you've taken your photo, you can change the amount of background blur, add studio lighting effects, or even remove the blur completely.
Read on to learn how to edit your Portrait mode photos to make them even more incredible!
3. Use Depth Control To Change The Amount Of Blur
Do you have the iPhone 11, 11 Pro, 11 Pro Max, XR, XS, or XS Max?
If so, you'll have an amazing iPhone camera feature called Depth Control.
Depth Control allows you to change the strength of the background blur… after you've taken a picture!
How do you use Depth Control?
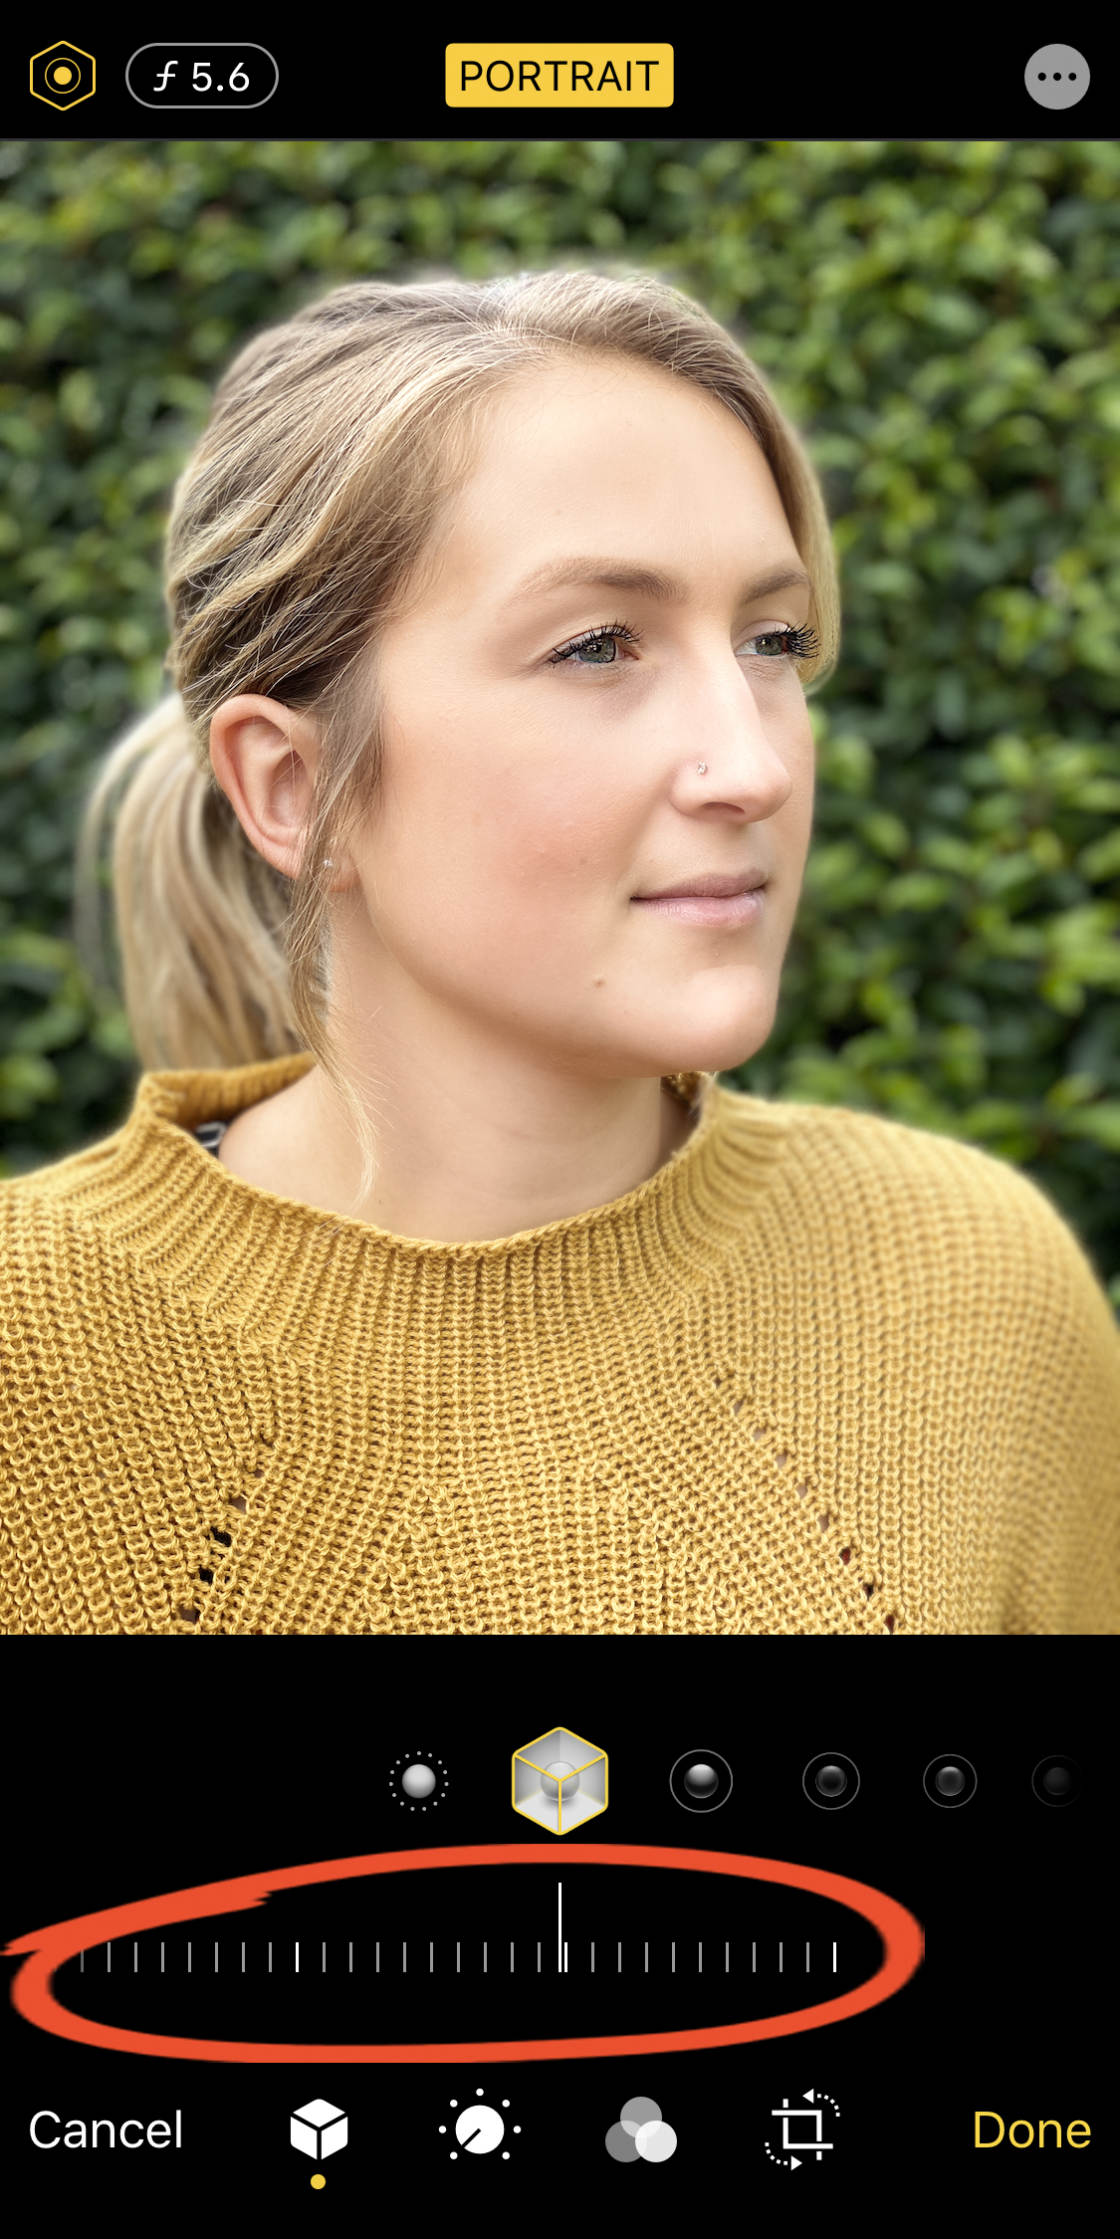
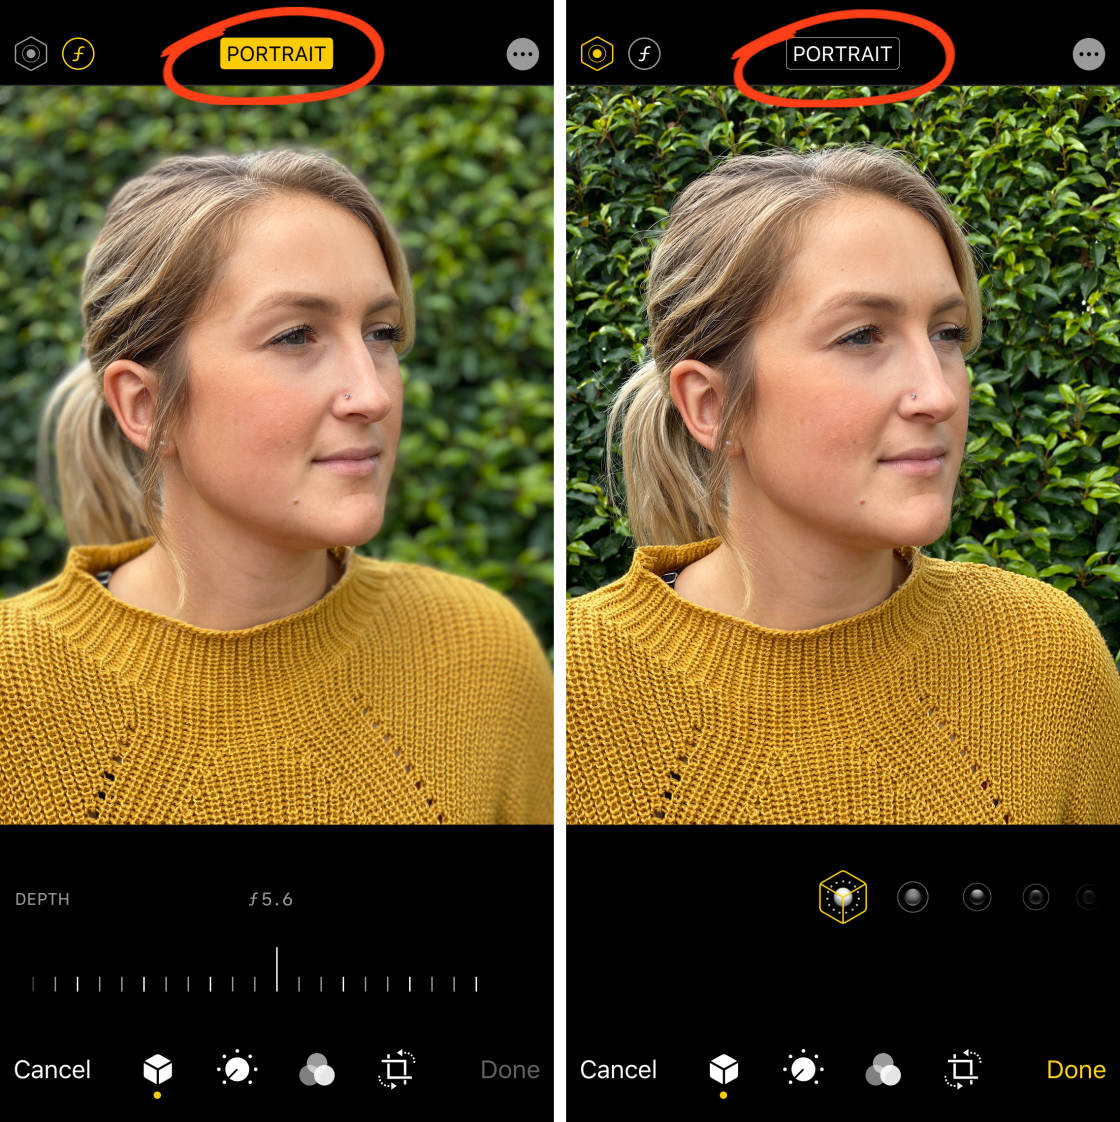
Open your portrait photo in the Photos app and tap Edit.
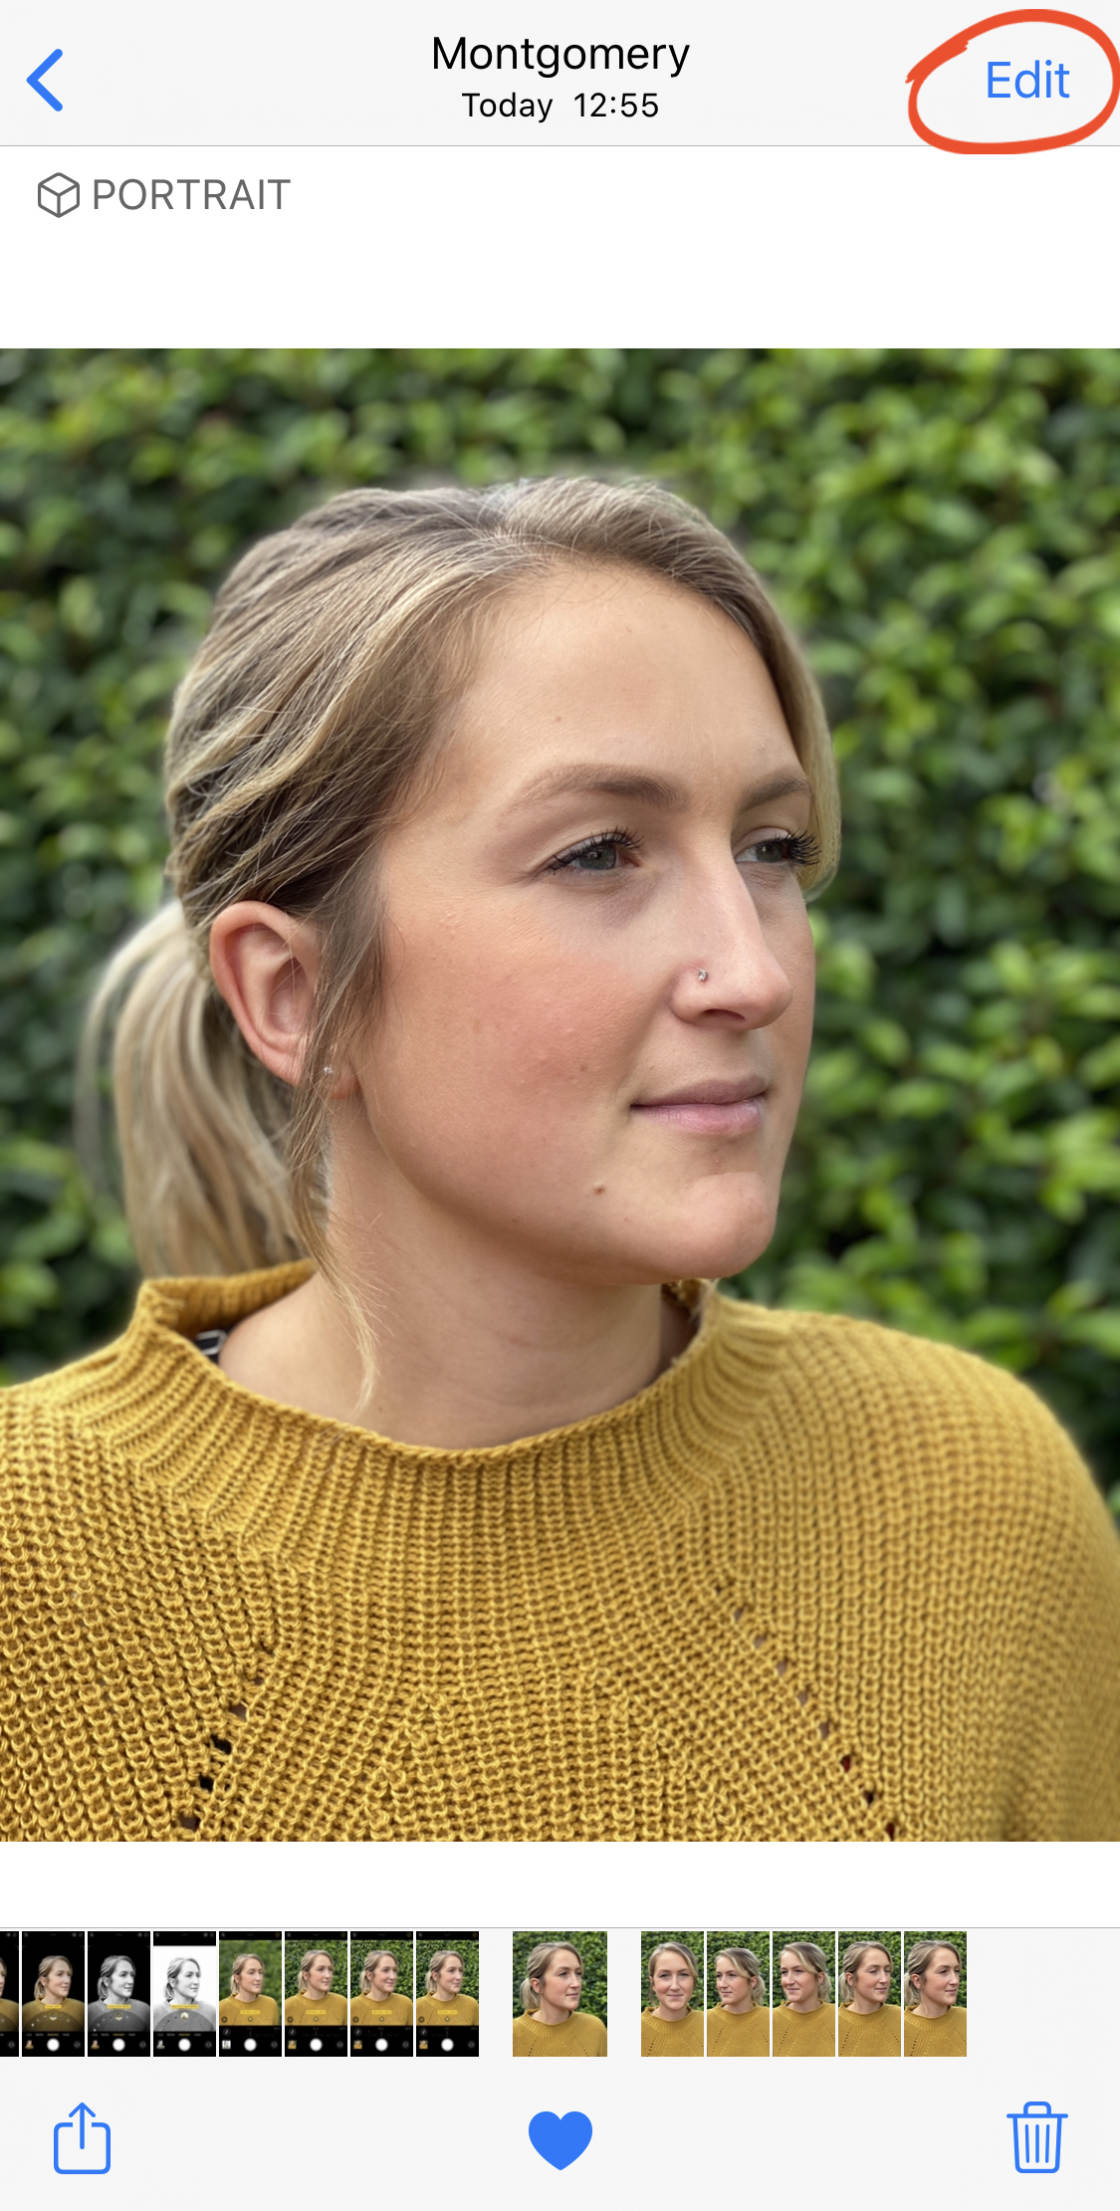
Next, tap thef/number icon at the top left of the screen.
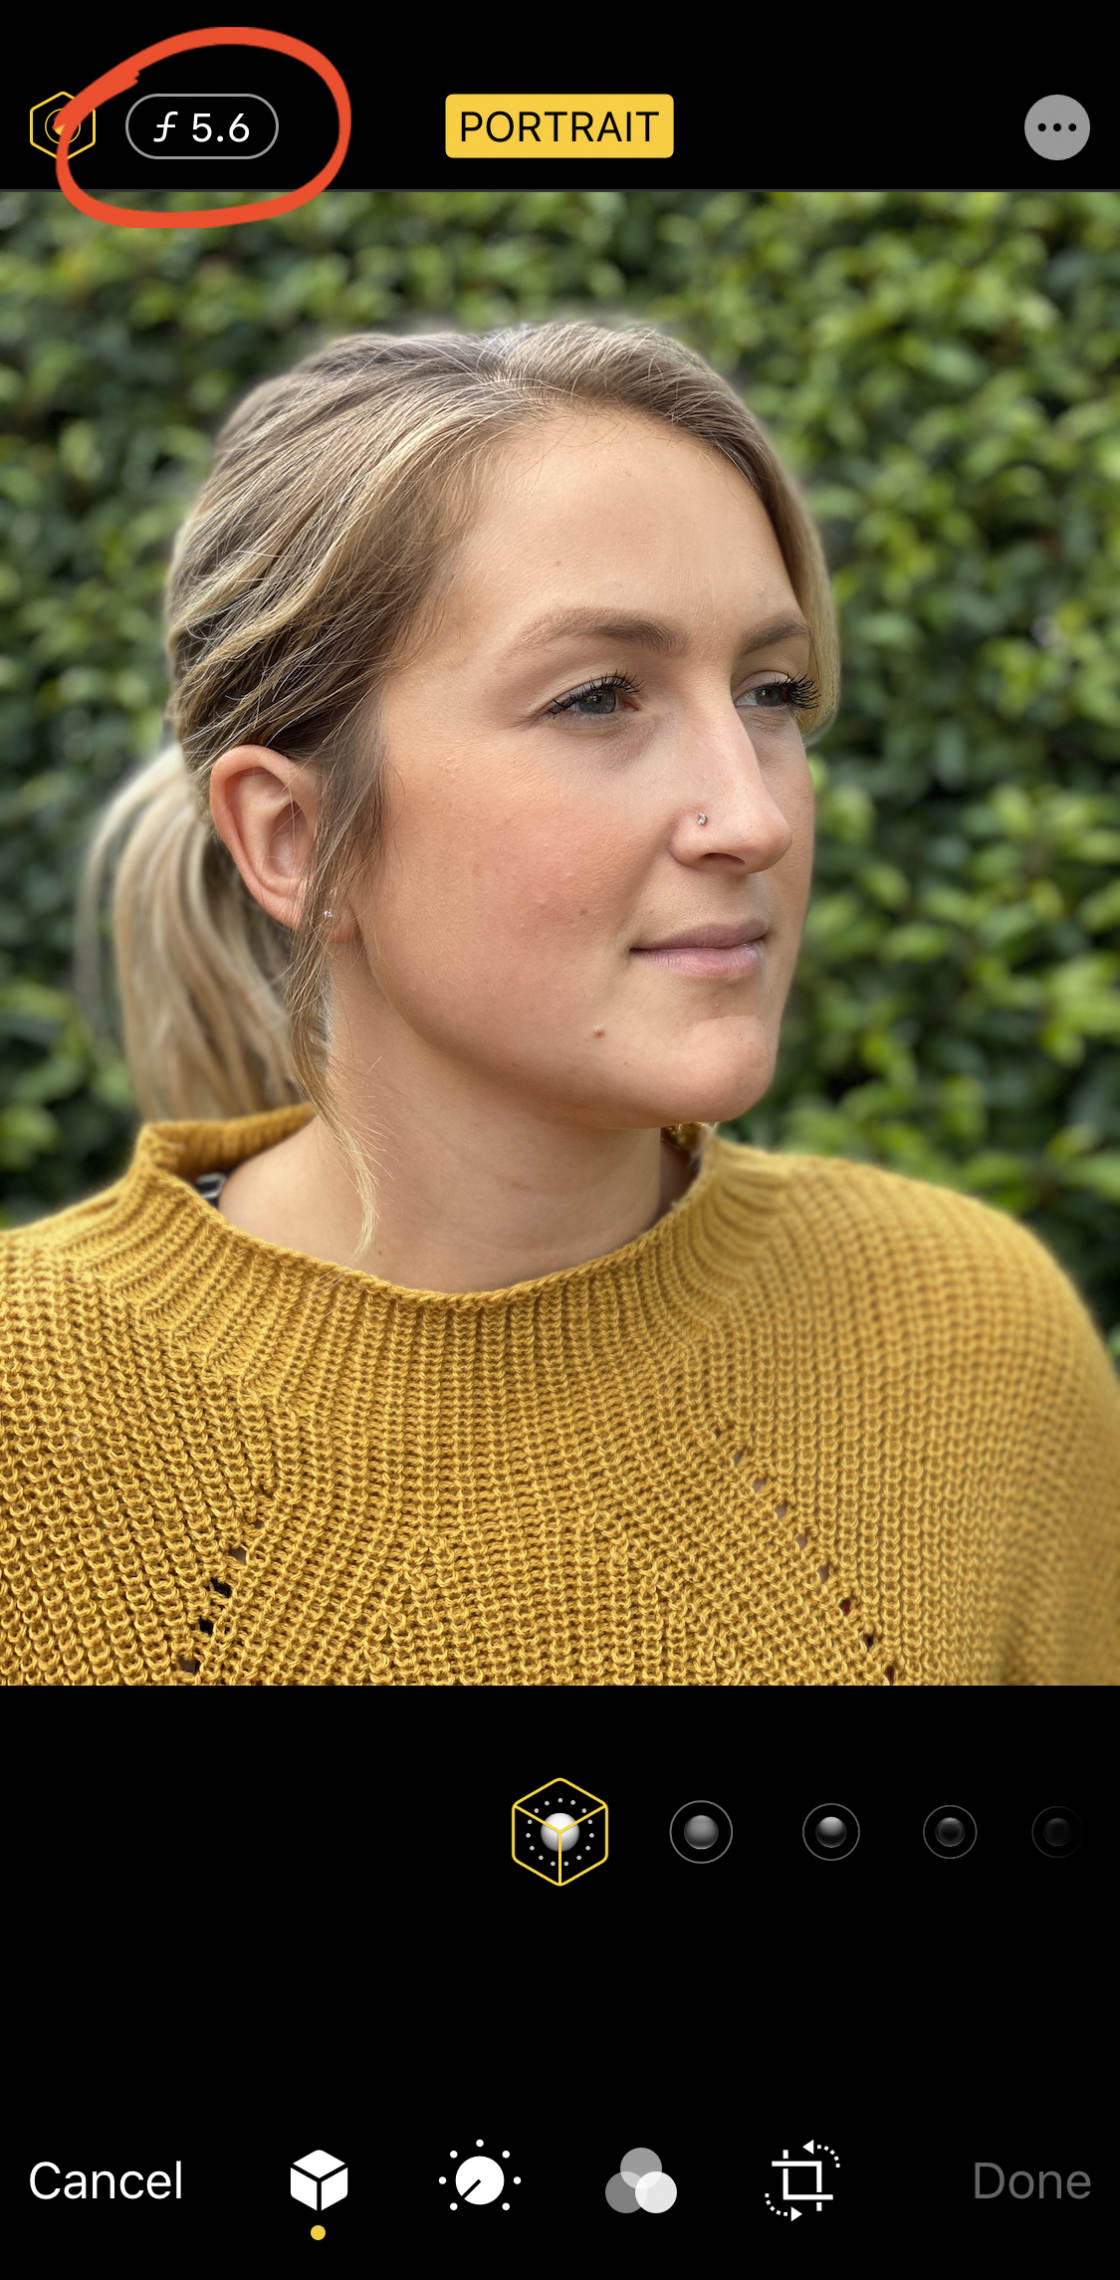
Beneath your photo, you'll see the Depth slider. Drag the slider left or right to make the background blur stronger or weaker.
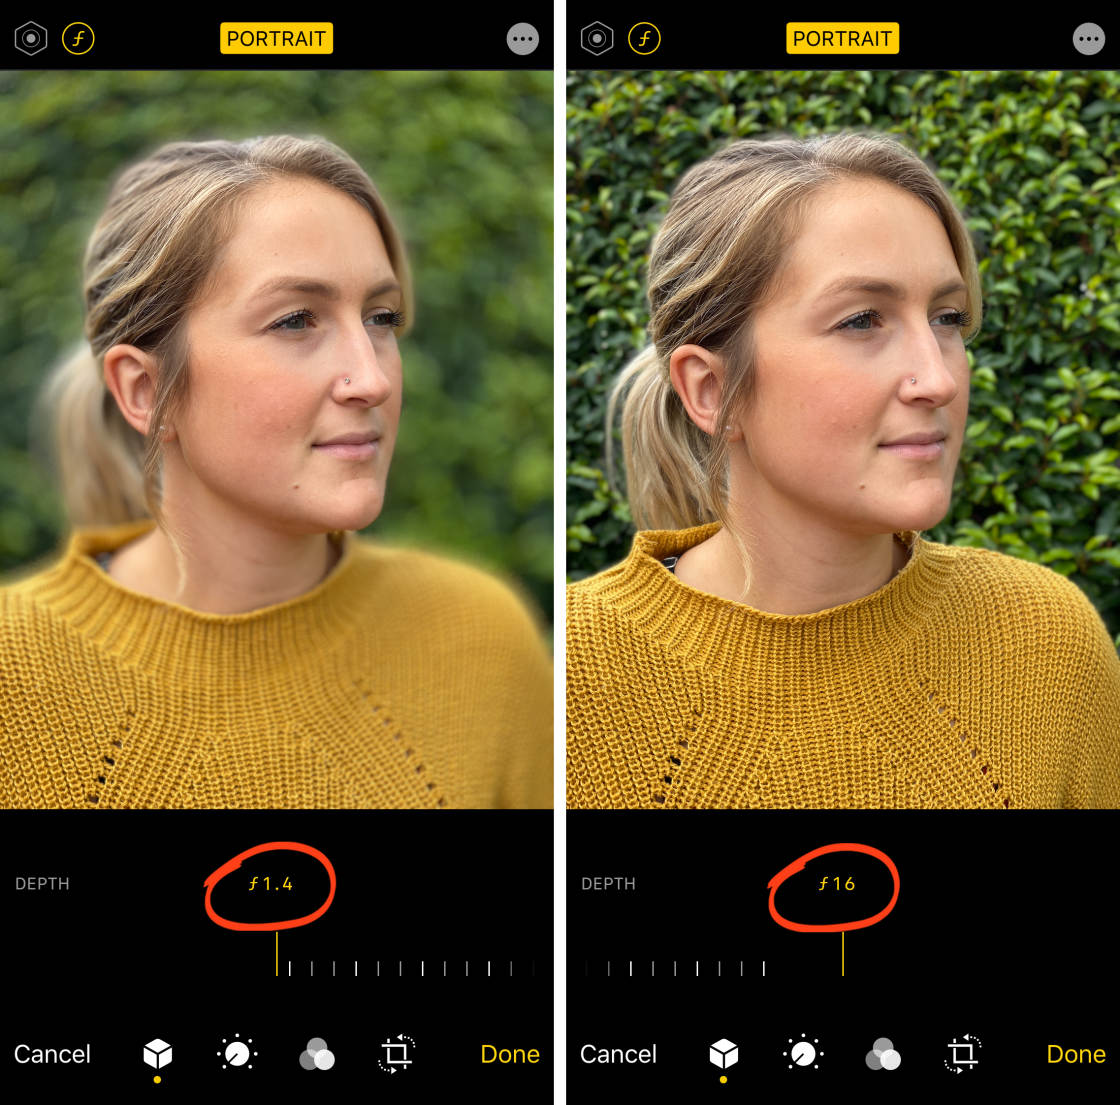
The lower the f/number, the blurrier the background will be. In the examples above, f/1.4 creates a very blurry background, while f/16 shows more detail in the leaves.
When you're happy with the blur strength, tap Done to save the changes.
You can change the blur strength at any time by opening the Edit options again.
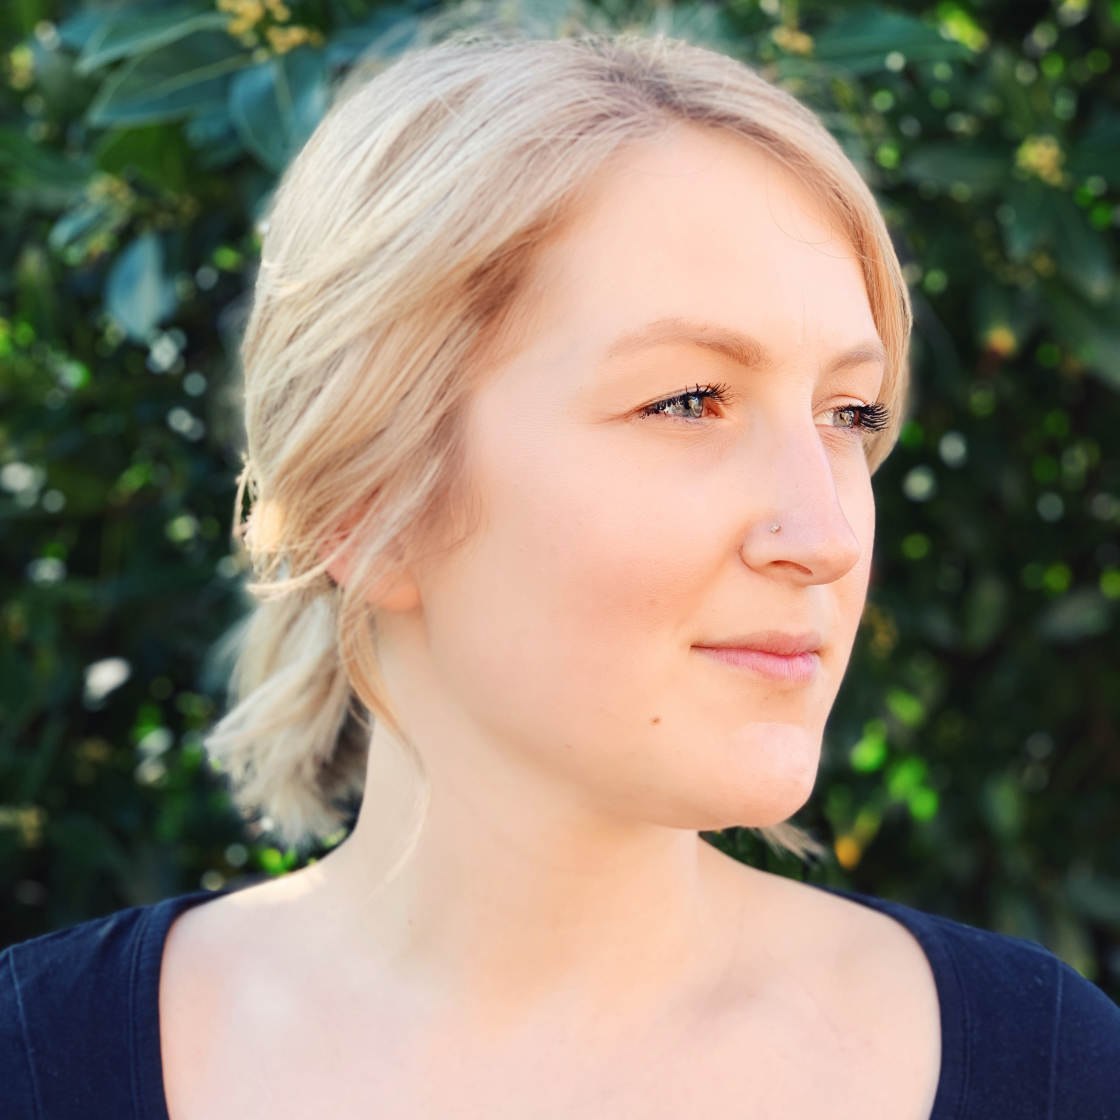
Depth Control is an incredibly powerful Portrait mode tool.
It gives you ultimate flexibility, allowing you to choose just the right amount of background blur to suit your photo.
4. Use Portrait Lighting To Enhance The Light In Your Photos
Portrait Lighting (not available on the iPhone 7 Plus) allows you to add different studio lighting effects to your photos.
For example, you can brighten your subject's face or add shadows to define features. You can even make the background completely black or white.
You can select a Portrait Lighting option at the time of shooting. But it's better to do it after taking a photo.
Why? Because you'll have more time to experiment with the different options.
So, how do you apply a Portrait Lighting effect to your photo?
Open your Portrait mode photo in the Photos app, then tapEdit.
Ensure thePortrait Lightingicon (hexagon) is selected at the top left of the screen. You'll see the Portrait Lighting options (cube icons) beneath your photo.
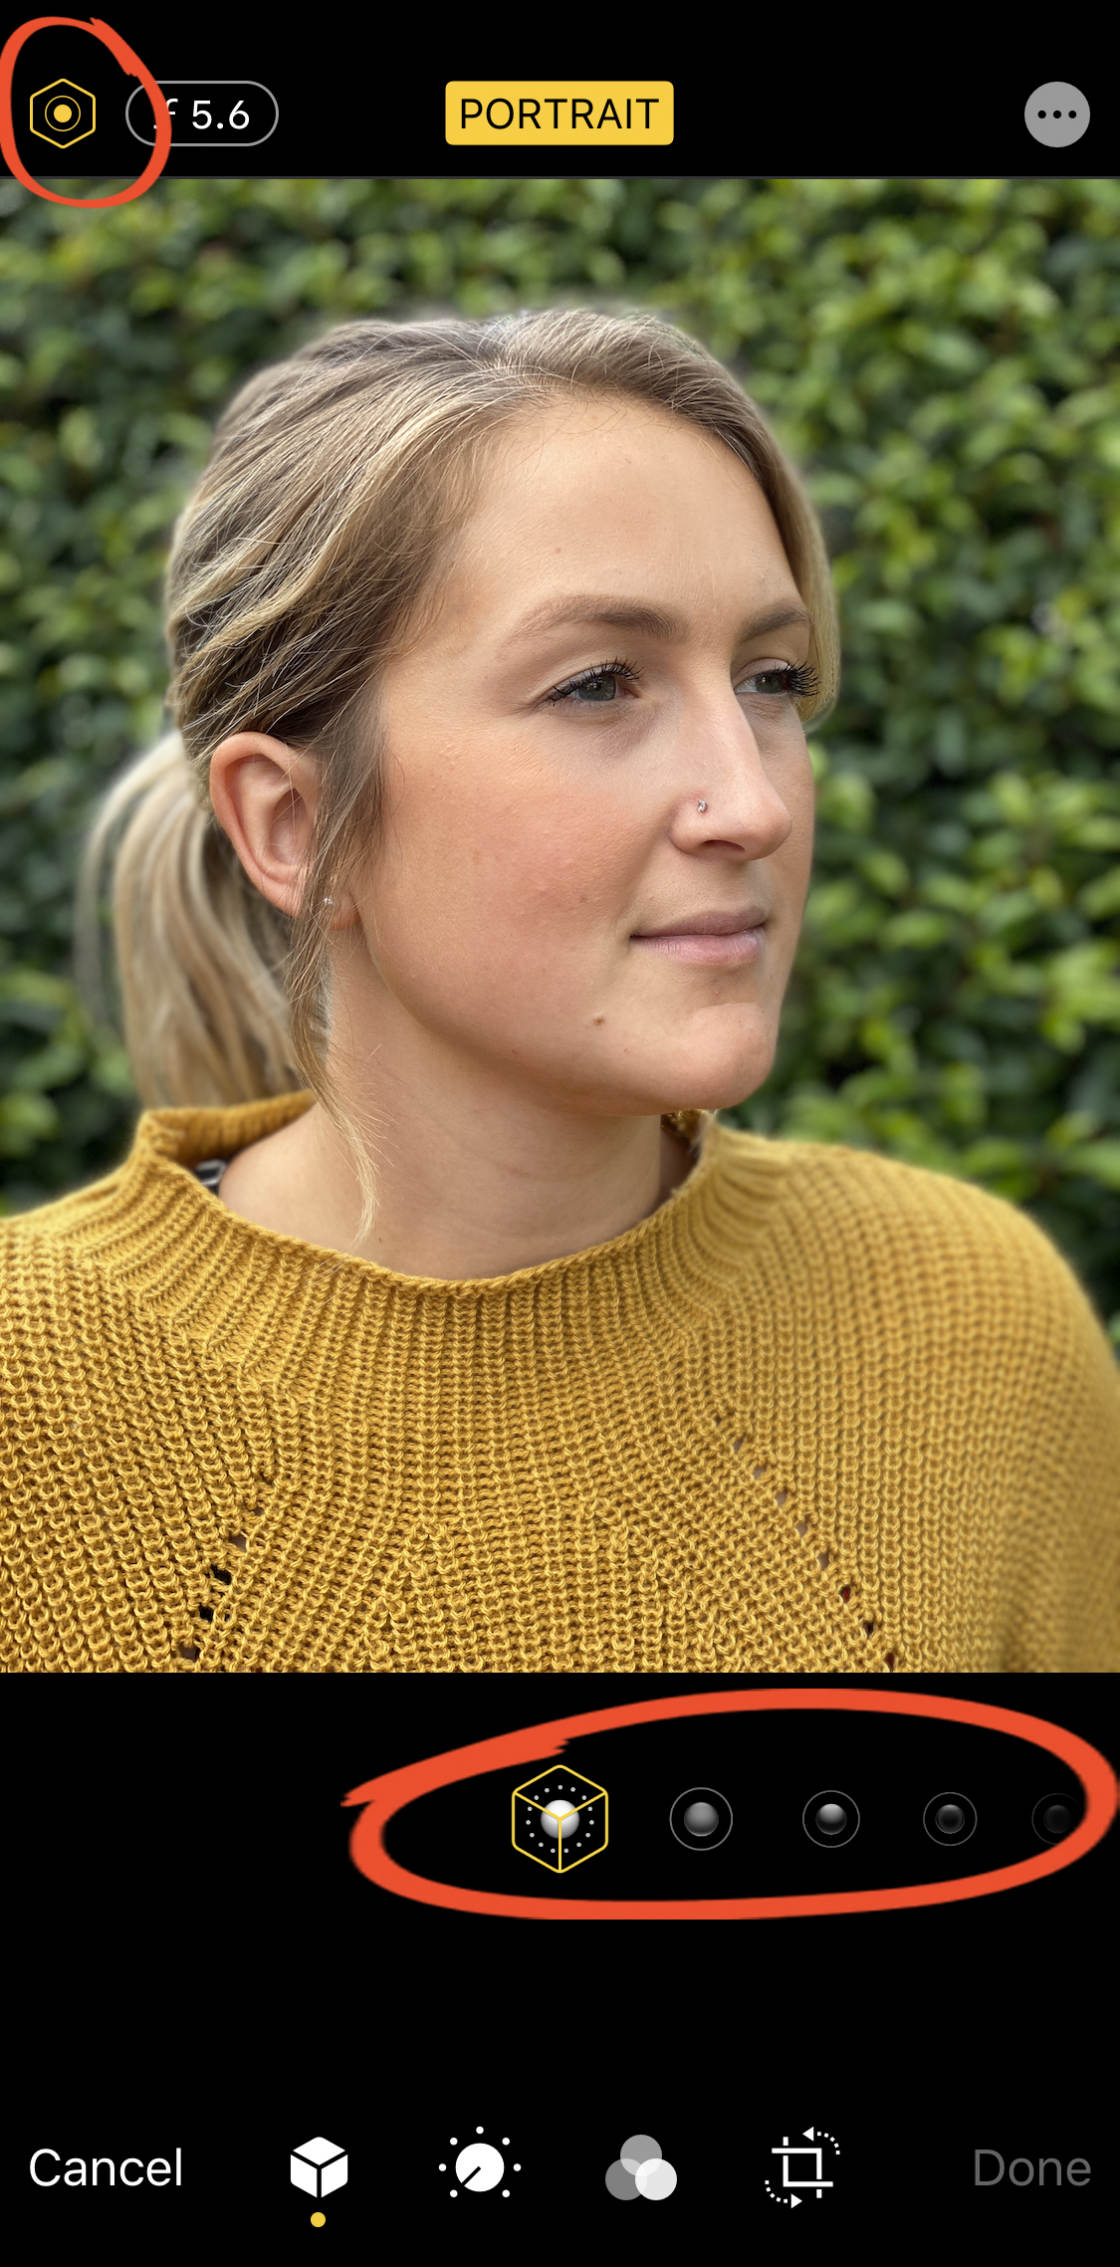
Swipe across the Portrait Lighting icons beneath the image to apply them to your photo.
The default Portrait Lighting option isNatural Light. This setting doesn't modify the lighting in any way.
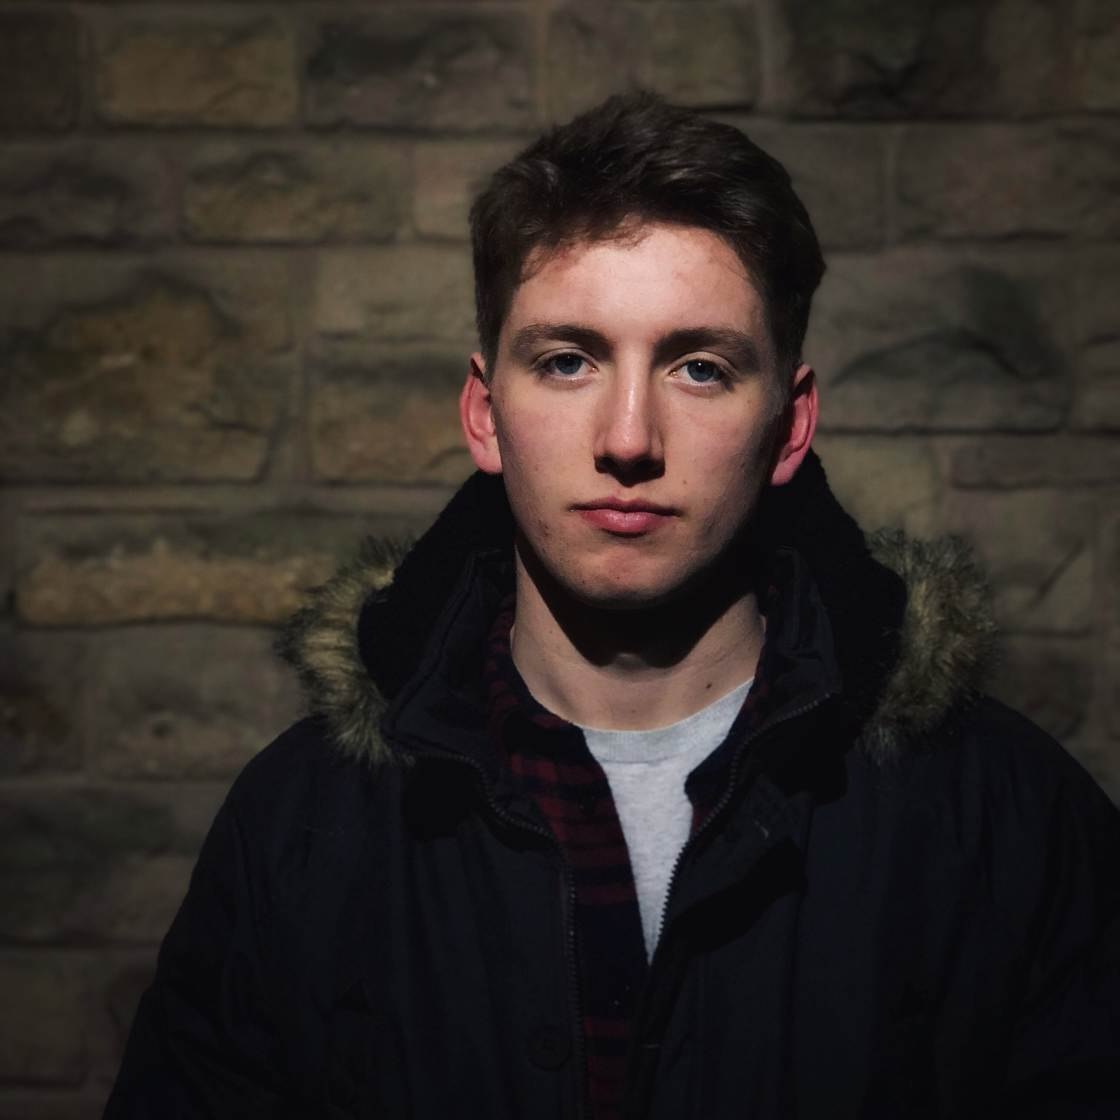
Studio Light brightens the subject's face (as if they were illuminated by studio lights).Contour Light adds shadows for more defined facial features.
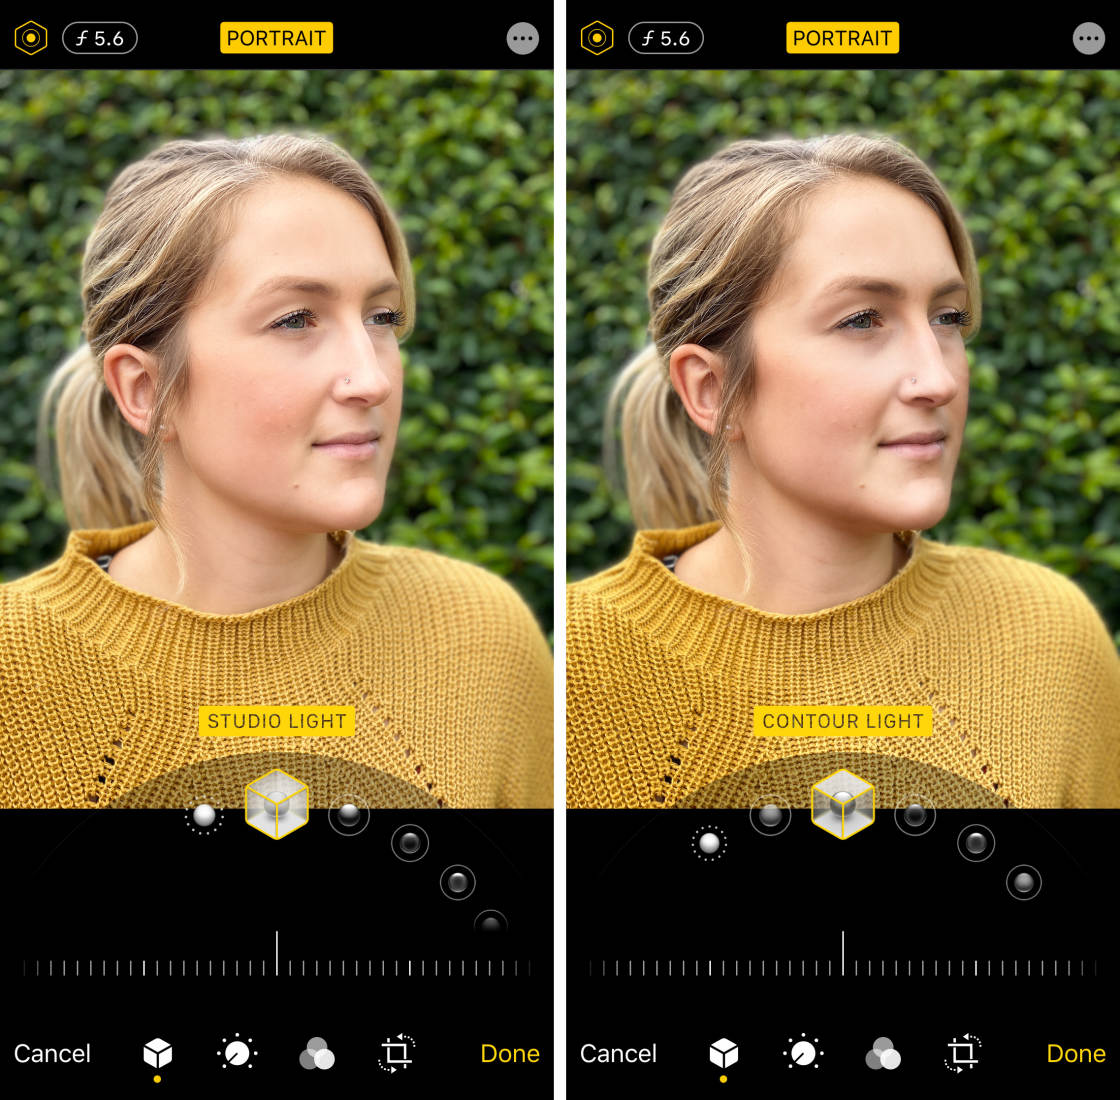
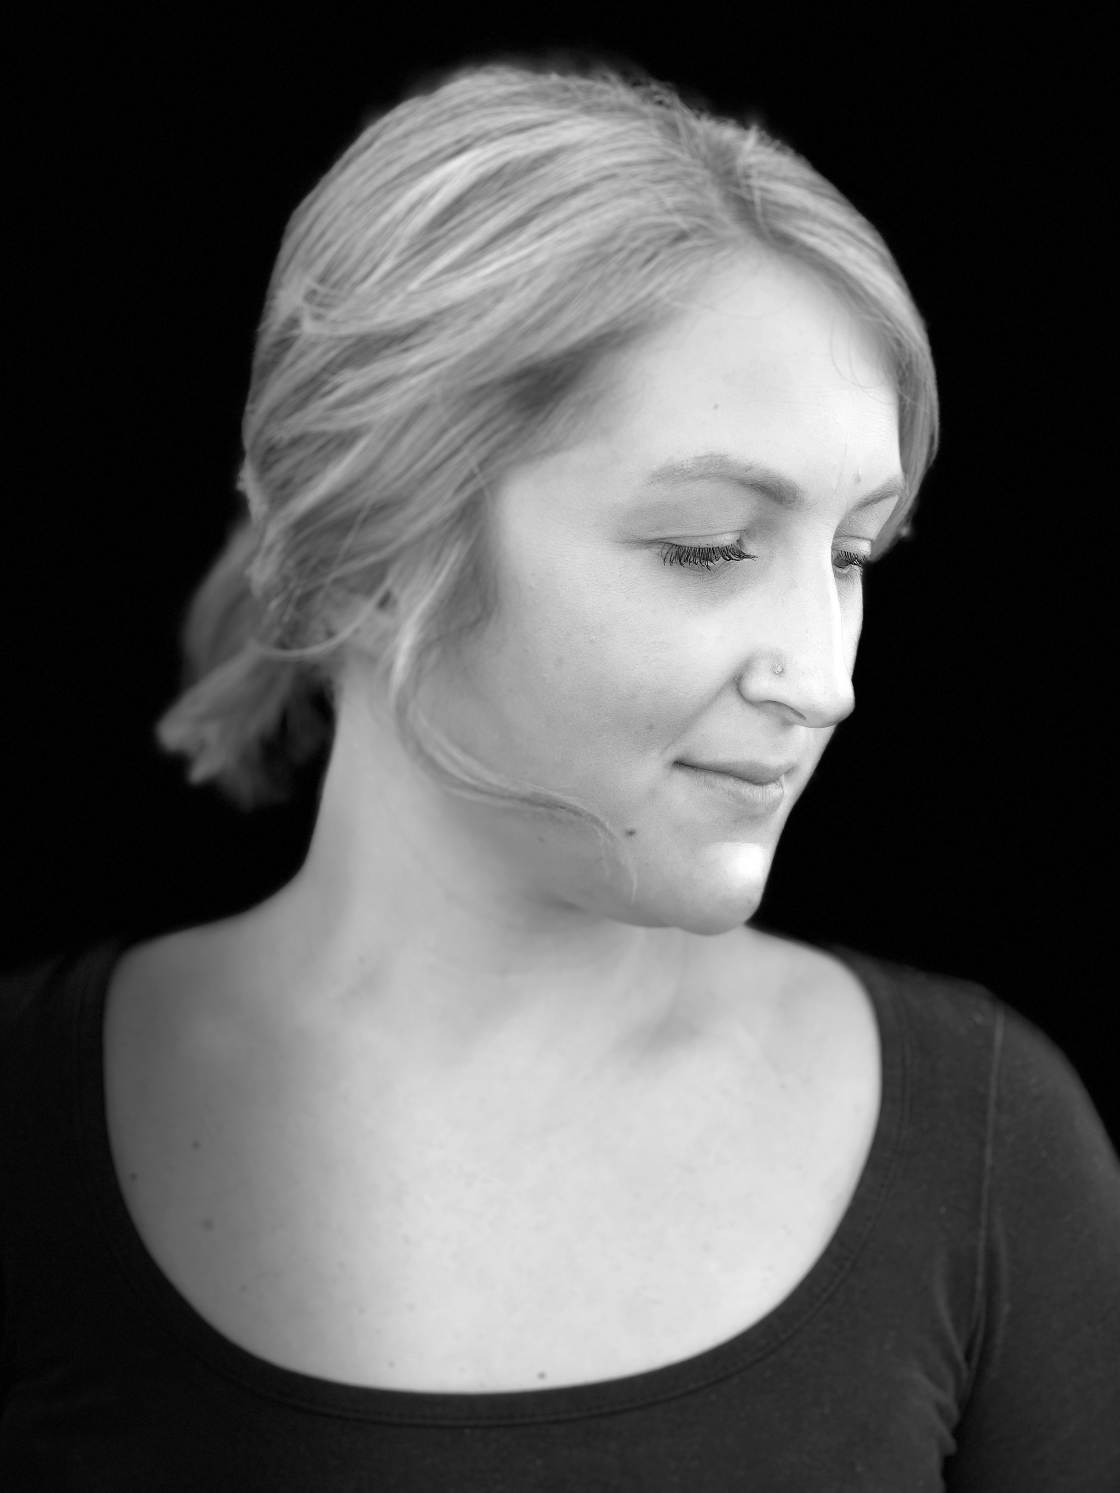
Stage Light makes the background completely black (as if the subject was standing under a spotlight on a stage). Stage Light Mono is the same as Stage Light, but it turns your photo black and white.
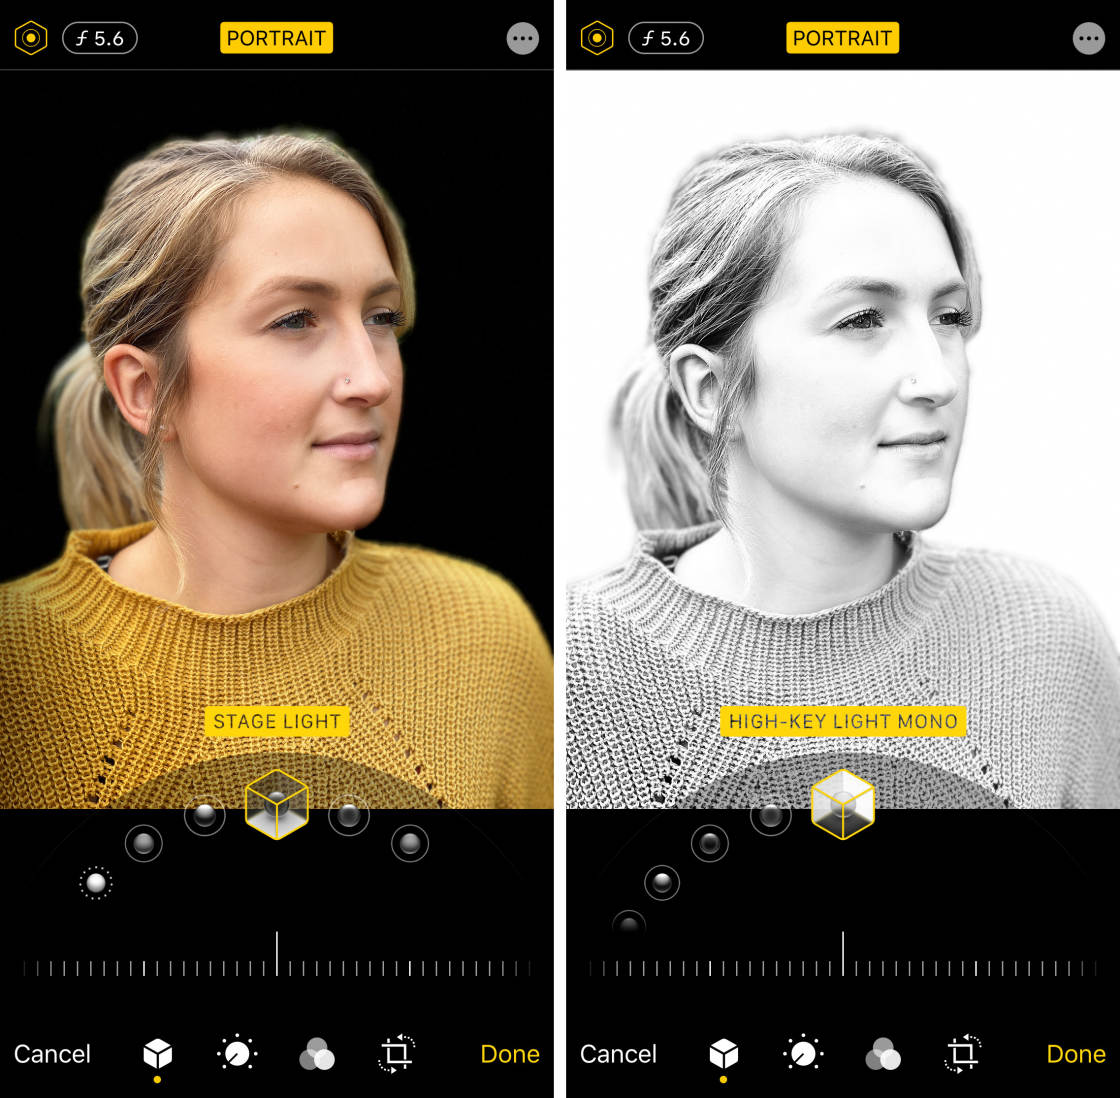
High-Key Light Mono creates a black and white portrait against a white background. (This effect is only available on photos shot with iPhone 11, 11 Pro, or 11 Pro Max).
When you've chosen a Portrait Lighting option, you can adjust the light intensity using the slider.
TapDone when you're happy with the Portrait Lighting effect.
You can change the Portrait Lighting at any time by opening the Edit options again.
To sum up:
For a subtle lighting effect, choose Studio Light or Contour Light.
To add drama to your Portrait mode iPhone photos, try Stage Light, Stage Light Mono, orHigh-Key Light Mono.
If you prefer not to add any lighting effect, choose Natural Light.
Once you see how Portrait Lighting makes your portraits stand out, you won't regret using it!
5. How To Remove The Background Blur From Portrait Photos
Most of the time, Portrait mode does a great job of keeping your subject sharp and blurring out the background.
But sometimes your Portrait mode photos might not turn out perfect.
For example, the camera might blur part of the subject or keep part of the background in focus. This can be particularly noticeable around the subject's hair.

If you decide your photo would look better without the blur effect, you can easily remove it… after taking the photo.
Open your image in thePhotos app and tapEdit.
To remove the background blur, tap the yellow Portrait option at the top of the screen. You can turn the blur effect back on at any time by tapping Portrait again.
6. Choose The Best Background For Incredible Blur
Of course, it's essential to have a main subject in your portrait photos.
But the background is equally important… even though it gets blurred out.
Here are some useful tips for choosing a great background for your portrait photos:
First of all, the background needs to have some detail. If your subject is stood in front of a plain wall, there won't be any detail to blur.
You should also make sure the colors of the background enhance your subject.

Another thing to consider is how far the background is from your subject.
Portrait mode works best when your subject is far away from the background. If the subject is standing close to the background, the blur effect won't be as strong.
So, for a blurrier background, ensure there's a large distance between the subject and the background.
Taking the time to find the right background will make all the difference to your Portrait mode iPhone photos.
Remember, the background is just as important as the subject… even though it's blurred!
How To Take Portrait Photos With Iphone
Source: https://iphonephotographyschool.com/portrait-mode/
Posted by: herreracized1947.blogspot.com
0 Response to "How To Take Portrait Photos With Iphone"
Post a Comment