

How to create Local User Account using PowerShell in Windows 11/10
If yous are unable to open Windows Settings panel and yous want to create a new user account on your Windows xi or Windows x computer, and then this article will help yous. You tin can create a Local User Account using PowerShell.
There are mainly ii types of user accounts in Windows xi/x-
- Local User Account
- Microsoft Account connected User Account
It is non possible to create a Microsoft account continued user account with the help of Windows PowerShell but is very piece of cake to create a local user account using PowerShell.
Before getting started, y'all should know that you lot can create a user account with or without a password, and the commands are unlike equally they depend on your choice.
Create new Local User Account without countersign using PowerShell
To create a new local user account without any password using Windows PowerShell, open Windows PowerShell with administrator privilege. For that, press Win+X and select Windows PowerShell (Admin) from the list. After that, execute the following control-
New-LocalUser -Name "user-proper noun" -Clarification "Small description" -NoPassword
Practice not forget to replace the user-name with an bodily username that you want. Too, supersede Pocket-sized description text with the matter that yous want to show as a description.

Later on executing the command, every bit mentioned above, y'all will be able to gear up your business relationship and use it accordingly.
Create a new Local User Account with a password using PowerShell
Open the Windows PowerShell with administrator privilege. For that, y'all can follow the guide as mentioned before, or you can search for the "PowerShell" in the Taskbar search box and select the Run as Ambassador pick on your right-manus side.
After opening PowerShell, y'all need to create a countersign for your user business relationship. To do so, enter this control-
$Password = Read-Host -AsSecureString
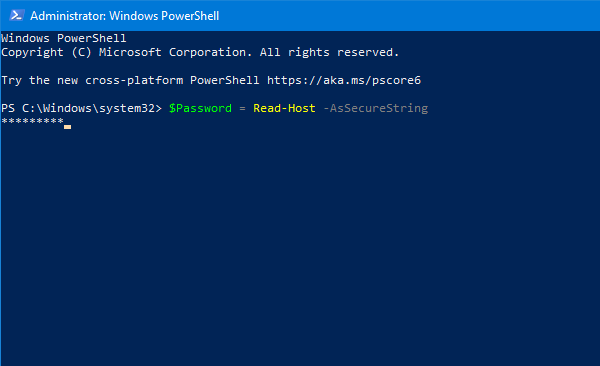
At present you demand to type a password that y'all want. Make sure you take set a strong password.
After typing the password and hitting the Enter button, yous demand to enter this command-
New-LocalUser "TWCTEST2" -Countersign $Countersign -FullName "TWC Test Account" -Description "Small description"
Replace TWCTEST2 with your desired username, TWC Test Account with the full proper noun of your user business relationship, and Small description with brief info virtually your account.
After entering this command, you lot tin find a screen similar this-
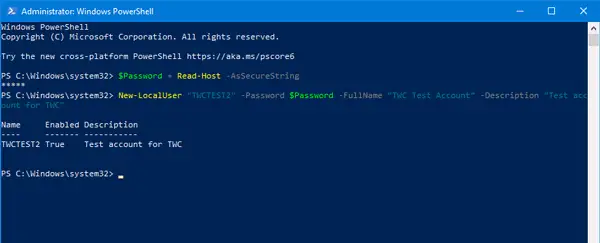
That means your business relationship is successfully created and gear up to use. However, if you want to assign your account to a group, you can use the following command-
Add-LocalGroupMember -Group "Administrators" -Fellow member "TWCTEST2"
Hither are two things that you should know. First, if yous're going to add together the new business relationship to your Administrator group, you can keep it as is. 2nd, y'all have to replace TWCTEST2 with the username of your new user account.
How to delete User Account using PowerShell
To delete user account using Windows PowerShell, open the Windows PowerShell with administrator and enter this command-
Remove-LocalUser -Name "user-name"
Do not forget to replace the user-name with the original user name that you desire to delete from your reckoner.
That's it! I hope it volition help you.

Source: https://www.thewindowsclub.com/create-new-local-user-account-using-powershell
Posted by: herreracized1947.blogspot.com
0 Response to "How to create Local User Account using PowerShell in Windows 11/10"
Post a Comment